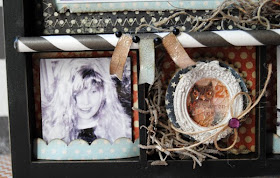
Here is my Halloween Spoon...... : )


 Step 1: I purchased several spoons at Wal-Mart. I took spray paint I had on hand and sprayed it a cream color. After the paint is dry, lightly sand the edges to distress it.
 Step 2: I took my designer paper (My Mind's Eye) and Modge Podged it to the handle of the spoon. Again, when it is dry, lightly sand the edges to distress it.
 Step 3: Cover the designer paper with glossy accents and sprinkle with glitter.
 Step 4: Depending on the size of your spoon, the Spellbinder's ovals can vary. Just find the size that fits inside the spoon! I used the Petite scalloped oval as well. : )
 Step 5: I printed my pictures at a 2 x 3 size, but again, this may vary depending on the size of your spoon.
 Step 6: I took my oval die and placed it over my image. I took artist's tape, which is a low tack tape, and taped the die down, so it doesn't shift while I am die cutting.
 Step 7: Here are all of my pictures die cut! : )
 Step 8: Using my scalloped oval die, I die cut 9 pieces.
 Step 9: Adhere the photos to the scalloped ovals.
 Step 10: I took black seam binding and glued my pictures to the seam binding side by side. Be sure to leave "tails" at both ends of your album.
 Step 11: My cover which is an image from the Crafty Secret's Halloween Journal Booklet, was glued to the backside of my first image.
 Step 12: Since the spoon has some depth, I added dimensional foam circles, and added a bit of glue to make sure it was more secure.
 Step 13: Since this spoon was particularly deep, I added circles......
 Step 14: Add a bit more glue, so the album doesn't go anywhere!
 Step 15: Place your last image on those dimensional foam circles.
 Step 16: To keep my album closed and secure I use some velcro cut into small pieces.
 Step 17: To fold your album, use an accordian fold. (Back and forth, back and forth). Between folds use a small piece of velcro on the top layer and bottom layer.
 Step 18: Tie the seam binding into a bow to secure the album's closure. Then embellish the spoon and pretty it up! I used my Cricut Expression and the Happy Haunting's cartridge to cut the bat. I added black glitter to his wings. The sentiment is by Crafty Secrets and is part of the Costume Cuties' set.
 I hope my directions were clear! If you have any questions please feel free to leave a comment here and I will answer any questions you might have!
Have a wonderful weekend my friends!


