Showing posts with label texture paste. Show all posts

Thursday, February 3, 2022

My Funny Valentine

Good morning!
I am on my second snow day as we saw about 10 inches of snow over the last 36 hours! 
It was a crazy amount of snow, but fortunately, I was able to work from home and not risk driving in it.
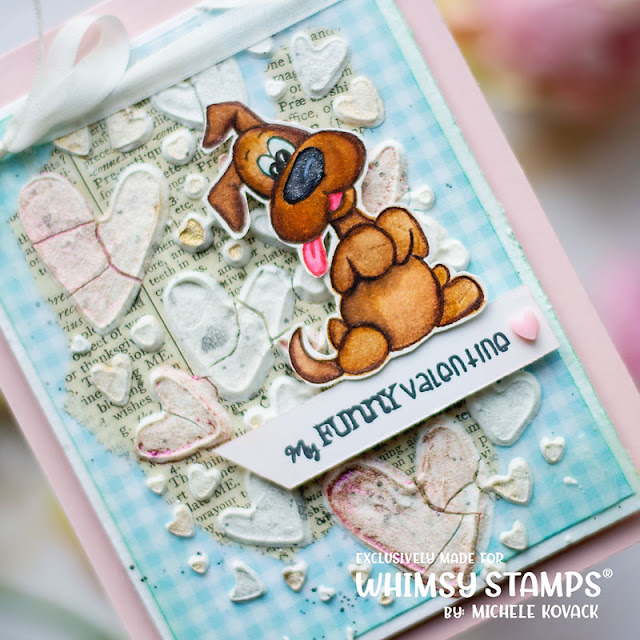
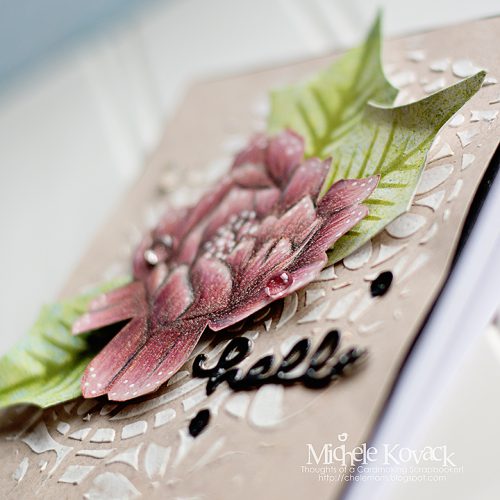
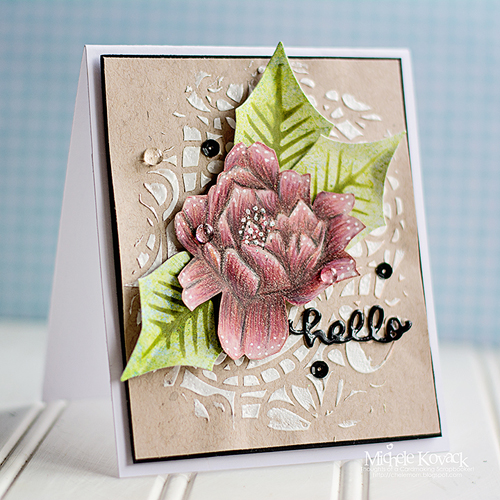
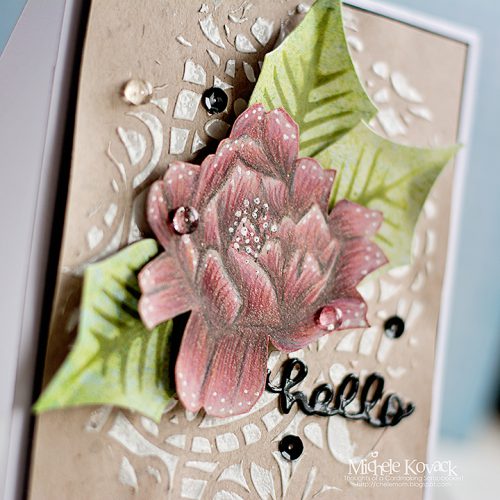
Today I have a Valentine's Day card using some fun new Whimsy Stamps! It was fun and a bit experimental. I have been using the metal dies as stencils. (Yesterday's post too!) I Gesso'd vintage book paper to a blue gingham paper from the 6 x 6 Mix n Match collection.  I then used the Slimline Hearts Background Die as a stencil with Crackle Texture Paste. 
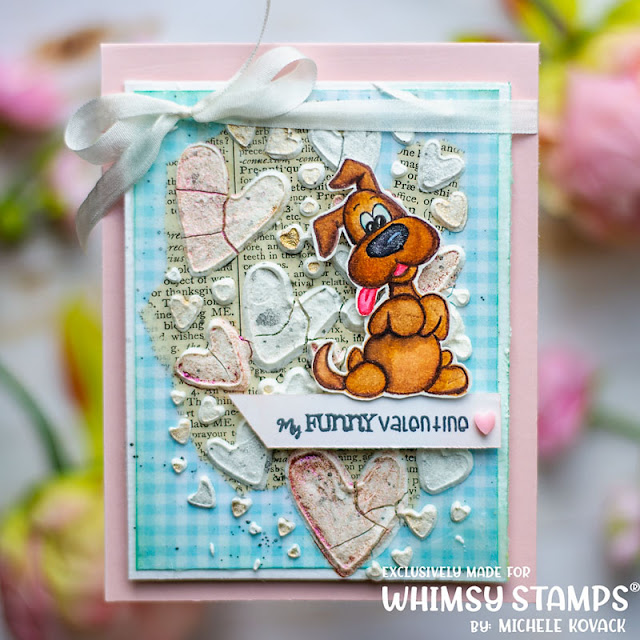
Once it was dry I added some random water colors over it.  This adorable little pup is from the Doggie Valentine Friends.  I used my Zig Clean Color Markers and fussy cut him.   I stamped the sentiment on white card stock and cut the end at an angle. 
Thank you so much for stopping by today!
Stop by Whimsy Stamps to check out all of the new products!


Tuesday, February 1, 2022

Vintage Malarkey

Hello my sweet friends!
I have a St. Patrick's Day card to share today using the new Malarkey Word Die from Whimsy Stamps.  I love that this set comes with the hat too.  I went back to my comfort zone and went a bit vintage.  I used water colors and paint splatters for the hat.  The word was cut using black card stock and green glittery paper.  I offset them a bit so it would pop off the card.  
For the background I used old vintage paper, my sewing machine for some wonky stitching, and I used the new Slimline Shamrock Background die.  But I decided to use it as a stencil with crackle texture paste  I love the interest it gives to the background.  It just makes you want to reach out and touch it! I added a few confetti pieces to finish off the card.  And by the way, these are so delicious in person! 
Thank you for stopping by today! Be sure to check out Whimsy Stamps for their full release!
Have a great day. :)


Thursday, November 4, 2021

Happy Holidays!

Hello friends!
I have officially started my Christmas cards for the season! I used Whimsy Stamp's Slimline Pines set. I stamped the image in a brown ink and went over the "greenery" with a Green Copic marker.  I stamped the sentiment in black.  The edges were given a bit of color using Tim Holtz' Slavaged Patina Oxide ink. I splattered additional ink with water and a paint brush.  
Each pine cone was given a bit of texture paste.  I used a small paint brush to apply it.  While it was still wet, I sprinkled glitter over it to give the appearance of snow. 
The background is a combination of vintage music paper and an embossed panel using the new Sweater Embossing Folder.  I tied a couple of jingle bells to the panel with twine, and added a few clear drops to finish off the card. 
For all of Whimsy's new products be sure to head on over to their site!


Thursday, August 24, 2017

A Rose, Texture Paste, and Prismas!

Hello?
Did you just hear Adele in your head?
Now that you will have that song stuck in your head all day......your welcome.  ;)

I am up on the Scrapbook Adhesives blog today with this little number.
An Altenew stamp that was colored using Prismas. I used the coordinating die cut.
I love the look of texture paste on kraft paper so that is exactly what I did here.  I left the edges rugged and somewhat unfinished.  Once it was dry, I adhered my rose and leaves using Crafty Foam Tape.  I layered the image on black card stock and the white card using E-Z Squares. 
I die cut the word, hello and gave it a coating of glossy accents.  Once it was dry I attached it to the card using Dodz-mini adhesive dots.  I also used them to adhere the sequins and clear drops. 
Our family hosted our 3rd annual Cortney Kovack Misericordia Golf outing.  We were so excited to be able to present Sr. Rosemary a check for $21,116 on Tuesday.  And meeting her is honestly like meeting Mother Theresa.  She is such a phenomenal person with a heart that is as big as Texas.  I just love this picture too....pure LOVE! 
Wish me luck! Today is my first "official" day back at school! Kids and all! ;) 

Monday, December 19, 2016

Water Colored Ornament!

Good morning and happy Monday to you! It is cold and snowy here in Chicago! It makes me want to cozy up in my home and craft! But duty calls and I need to get my booty to work....ugly Christmas sweater and all! ;)  I found a bit of "me" time this weekend and created several ornaments.  
This one uses a die from Spellbinders called, Heirloom Ornaments.  I used Tim Holtz inks on the smaller ornament piece in shades of orange, yellow, and red.  


I then layered a Tim Holtz stencil over both pieces and applied texture paste.  I sprinkled it with glitter while it was still wet.  I used Scrapbook Adhesives foam tape between layers for a bit of dimension.  I added a Just Rite Poinsettia die cut to the top.  It was given a wash of color with my Zig Water color markers.  I added a big white pom pom to the center and couple of jingle bells. 
I added an SRM sentiment as my finishing touch.  I love seeing all of the ornaments I've made through the years decorate the tree!  (Among my kids' homemade ornaments that they made me as little ones!)


Have a wonderful day! 
Thank you for stopping by today!

Monday, July 11, 2016

Water Colors and Stencils!

Created by Michele Kovack
Good morning my friends!  
Remember yesterday I said I had to pack?
Yea, haven't done it yet.
Total slacker!  I need to get it done today or I will be visiting San Francisco in the same outfit for 5 days! ;)
I am up on the SRM blog today with this card.  I used this cool background stamp and embossed it in white. (And have no idea what company makes the stamp.....I looked, no name). I colored it in with my Zig Markers.
Created by Michele Kovack
I layered a sun stencil over it and applied clear texture paste.  I sprinkled it with a glittery embossing powder and heat set it after it was dry.  I wanted to add a bit of depth to the rays, so I went back over it with my Zig marker in gray.  
I cut two pinking edge circles and water colored those as well.  I added SRM's Summer Sentiment.
For a finishing touch I added some white dots with a gel pen and adhered a few sequins.
Created by Michele Kovack
Okay, I am not kidding....
I am going to pack! 
:)

Tuesday, March 10, 2015

Purple and Bronze....

Good morning!
I am up on the Scrapbook Adhesives by 3L blog today with a tutorial on how I created this bright cheery card!
Be sure to stop by to see what kind of madness ensues in this brain of mine!
As always, these projects of mine seem to take on a life of their own!
A short and sweet post!
Have a great day!

Thursday, November 6, 2014

JustRite's November Release-Caring Thoughts

I have another new release to share with you today from JustRite!  It is a pretty sympathy set called, Caring Thoughts. Sympathy cards are often very difficult to make.  I like to make them ahead of time, so I have it when I need it.  I have been on a gold and silver kick lately, so I decided on that color scheme.  I embossed the flowers in gold embossing powder by WOW.  
The background was created using a stencil, embossing paste, and silver embossing powder. I slipped a piece of gold glitter cardstock underneath so it would peek out a bit.  I added my sentiment, stamped and embossed on vellum, added ribbon, and a scattering of sequins.  
Here is the whole set....

Be sure to stop by the other designer's blogs for more ways to use this set! 


Have a great day!
Thank you for stopping! 
And in case you were wondering....I DID survive the social security office! ;)
I also have some Halloween pics to share soon!


Saturday, July 12, 2014

JustRite's New Release-Signs of Christmas!

It is a rainy gloomy Sunday morning...but all is good in my world!
I like days like this where I don't feel guilty moving a bit slower. Wearing my PJ's a bit longer, and having that 2nd cup of coffee!
JustRite has released some really cool Christmas stamps. Today's set is called, Signs of Christmas. 
It includes the old fashioned street lamps with various signs to post.  And the best part is there are, again, coordinating SVG cuts. 
I cut out the pieces using my Silhouette and stamped each one.  I used my Copic marker to add the rays of light behind it. I added snow with texture paste and glitter. 
I stamped the back panel with the little snowflake and added dots of glitter glue. I added my glittery holly, string, and a scattering of sequins.  
Here is the set I used as well as the coordinating SVG file. 
Have a great day!!!


Tuesday, January 7, 2014

JustRite's January Release-Butterfly Vines Background Stamp!

Good morning! I have another "cold" day off from school...so I am going to make the most of it!  I have cookies to bake with Cort, crafting to do, and a pot of chili to make.  
It is also the last day of JustRite's January release. 
Today's set is a gorgeous Butterfly Vines background stamp. I love anything that has to do with butterflies!
I stamped it in Versamark and heat embossed it in white.  I used my Tim Holtz Distress markers to give the "open" areas shades of pink. I used some texture paste and a Heidi Swapp stencil to create a textured, yet subtle background. 
I used the sentiment from an earlier released set called, Butterfly Kisses. I used the same technique as the background, Versamark, white embossing powder, and Tim Holtz Distress Markers. I cut it out and overlapped it with a strip of white cardstock.  Ribbon was tied vertically, a double bow was made, and an acrylic flower adhered to its center.  I added a felt stick pin I had made awhile ago.  
Here are the two sets I used to make my card. :)
JustRite is starting its Tutorial Tuesdays and I hope you can hop on over to their blog to see today's video!  
Have a wonderful Tuesday! And as always, stay warm! 


Wednesday, September 25, 2013

Many Thanks......

Good morning! 
:)
 I have a card to share with you today that uses texture paste and a stencil.  The stencil is by Heidi Swapp. I just adore these polka dots!.  Before applying the texture paste, I added a wee bit of silver paint and mixed it well.  I taped my stencil to the piece of card stock, and scraped it across using an old credit card.  I love the subtle texture it gives!
Since I wanted the background to take center stage, I added a few simple embellishments to finish off the card. 
The flowers were created using orange vellum and my Silhouette.  I added a couple of feathers, ribbon, and my stamped sentiment. As a final touch I added a few orange sequins. 
I feel as though lately, my blog is a bit blah.  I don't have as much time lately and I apologize for the numerous "short and sweet" posts.  I keep hoping my life will slow down just a tiny bit, but not sure if that's going to happen.  
I hope you can bare with me! 

Have a great day my friends!


Monday, September 23, 2013

Flowers, Flowers, Flowers!

I think I went a bit flower crazy on today's card!  
I couldn't help myself!  The main image is an image from Crafty Secret's Digital Garden set.  It was colored using my Inktense pencils.I added some Rock Candy Stickles to the center and a bit of glossy accents as well. I used a pretty Spellbinder's frame (Marvelous Squares) to matte the image.  The background used a Heidi Swapp stencil and texture paste.  I added a bit of silver ink to it once it was dry. I also added some Tim Holtz film strip, a bit of lace, and ruffled green paper to peek out under it. 
It's a bit busy....hopefully not too busy! ;)
My lil family went apple picking on Saturday.  It is a tradition we've had for the past 16 years or so. I know the kids are getting older and who knows if Kyle will want to go with us next year.  I took a lot of pictures that day knowing it could be our last year.  I still need to edit a lot of them and will share those in the next day or two.
 I handed the camera off to Kyle and he captured this one of Brian and me.  My man is scruffy, but I really like it!  
It's nice to get pics of us once in a while! ;)
Well it's the start of a new work week, so I've gotta run!
Have a great day my friends!