Showing posts with label vintage. Show all posts

Saturday, August 22, 2026

Halloween Freak Show!

Hello friends! It's been a bit since my last post!  I am back at school and it has been seriously kicking my butt!  I have to get back into the swing of early mornings and being on my feet all day.  ;)  
Whimsy's release was a few days ago and I am once again late to the party!
I love all of these Halloween dies and stamps....and once again I went the "creepy, scary" route. I can't seem to get enough of this clown from the Creepy Carnival stamp set.  I colored him in with Copics and colored pencils.  I fussy cut him out and added a tiny red ball to his nose.  
The book was so much fun to make!  I used the new Spell book stamp on kraft paper.  I colored it using Copics and Tim Holtz inks.  I added grit paste to the edges and let that dry.  For the center panel I stamped the sentiment from the Creepy Carnival stamp set in black.  I added the red claw marks and blood with the Clawed Stencil.  I added glossy accents to the blood portion. The edges were shredded a bit with scissors and grit paste was added. 

I used the Book Die set to make this shaped card. I curled the edges and distressed them a bit with scissors.  I added MORE grit paste! LOL After the grit paste was dry, I added black using a Tim Holtz Distress Crayon.  As a finishing touch I used my finger to apply Foundry Wax in Statue.  I used my embossing gun to heat set it.  The clown was added to the corner with Crafty Foam Tape.  
I added some Mummy cloth, twine, and an old clock charm I had in my stash. (That was also distressed with Grit paste, black Distress Crayon, and Foundry Wax)
I hope you enjoyed your visit! :)
Have a great weekend!!


Friday, March 7, 2025

Vintage Easter Whimsy Stamp's Style

Good morning friends!
I have 4 cards to share today using Whimsy Stamp's new Vintage Easter Quick Card Fronts.  The images are so beautiful! Each card was made the same way, just with different color card stock.  Each one was cut out using the new  Spring Rectangles Die.  I used Gold Foundry Wax (Tim Holtz) for the edges and heat set it with an embossing gun. The center panel was popped up with Crafty Foam Tape.  I added some machine stitching along the perimeter and Stickles to the flower centers.  Just a few extra touches and these cards are done!


Thank you for visiting!
Have a great day!


Wednesday, November 13, 2024

Primitive Blessing Card

Hello friends!
I have a quick post today.  (Is there any other kind lately with me?) My card uses the Primitive Quick Card fronts from Whimsy Stamps.  The images are so colorful and fun! I made it a bit more vintage by tearing the edges, machine stitching and adhering bits of lace behind the tears.  I added a bit of gingham ribbon, some old buttons, and attached it to a black card. 
Thank you for continuing to visit here.  I know lately my posts are sporadic. :)


Sunday, September 1, 2024

Whimsy's New Release!

Hello friends!
Happy Labor Day for those of you in the USA!
Today is Whimsy Stamp's new release....and it is a fantastic one!
These new Quick Card Fronts, Grunge Ghosts, are absolutely over the top cool! I used scissors to distress the edges and added machine stitching. Lace peeks out from underneath. I framed out my ghost with the new Keyhole and Keys die set.  I added grit paste to the keys and key hole.  Once it was dry, I rubbed some gold Foundry Wax on top.  I used my heat gun to set it.  I stamped the sentiments, cut them into strips, and sprayed some Mica stains over the top. 
I tied everything together with twine and stained Mummy Cloth.  
Aren't those keys perfect? ;)
Be sure to pop by Whimsy Stamps to see the entire release!
Have a wonderful day!


Wednesday, July 17, 2024

Vintage Joy!

Hello!
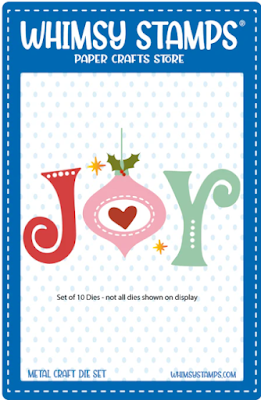
I have a quick post today sharing a card I created using new papers and dies from Whimsy Stamps.  I used the Joy Word Die with red card stock and stamped it with small snowflakes. I added some texture paste and glitter to give it a snowy look.  The papers are from the new 6 x 6 Chilling Christmas paper pack.   I used the larger holly leaves from the Holly Frame Die to frame my word. They were water colored and I added some glass glitter to their edges. 
Thank you so much for stopping by!


Saturday, July 6, 2024

Merry Christmouse

Hello!
I have another card using the new Quick Card Fronts, Matchbox Mice.  I am not usually a fan of these critters in real life, but here, they are so sweet! I used some texture paste on the edges to give it a snowy effect.  I used the holly and the frame from the Holly Frame Die set.  Some ribbon and string finished off the card.  
Thank you for stopping by!


Tuesday, July 2, 2024

Christmas in July!

Hello friends!  It is hard to believe that this week is 4th of July already! Summer needs to slow down a bit! Because before you know it, it WILL be Christmas! So here's to Christmas in July. ;)
You already know how much I adore these Quick Card Fronts by Whimsy Stamps, and this one, Matchbox Mice, is no exception. These sweet little faces....
I cut the panel into three pieces, distressed them with ink and scissors.  Added a strip of red cardstock and placed the image on top.  I did some sewing, added white paint splatters, and used the holly leaves from the Holly Frame Die set.   I tied a little red jingle bell with a metal holly leaf to finish off the card. 
Thank you for stopping by today friends!


Saturday, June 15, 2024

Vintage Bears

Hello!
I have two vintage inspired cards to share today using Whimsy Stamp's null new,  Quick Card Fronts-Take Care Bear.  As expected, these images are so sweet and vibrant! I distressed the edges with scissors and a sanding block.  I splattered a bit of black ink and used my trusty sewing machine to do some random, circular stitching.  I wanted the images to stay soft, so the paper behind it was done in soft watercolors.  I added ribbon, and flowers from my stash to finish off the cards.  
Pop by  Whimsy to see the full release! 
Have a great weekend!


Wednesday, June 5, 2024

Vintage Charm

Hello!
I have a new card to share that incorporates some vintage vibes.  It uses Whimsy Stamp's new Country Charm 6 x 6 papers.  I used scissors to tatter all of the edges, did some machine stitching, and added crackle paste to the edges.  I stamped a sentiment from the Southern Sugar stamp set.  I added some lace to peek out from under the paper and tied a bit of raffia with twine and lace. 
Thank you for popping by! 


Tuesday, April 30, 2024

Vintage Love....

Hello friends!
I finally got to meet me new granddaughter.  It was so bitter sweet leaving her back in Georgia. She is perfect in every way.  
*Sigh* 


I have a card today using several new products from Whimsy Stamps.  I used the Fashion Dress Form Die set.   I added black tulle to create the skirt, a small flower embellishment, and a bit of black string.  The back ground was done using the Postmarks Background stamp. It was stamped in a light pink and die cut using the Inverted Scallops Rectangle die and the Stitched Oval Die. 
Thank you for popping by!


Monday, April 15, 2024

Whimsy Stamp's New Release!

Hello!
Today is Whimsy Stamp's new release day!  I probably sound like a broken record, but I really do love these Quick Card fronts.  They make creating a card so quick and easy! These Paris images are gorgeous.  I did some machine stitching and created a double layer using the Mix and Match Scallop Rectangle dies.   I added some pink tulle and cut the sentiments into strips.  Hanging them vertically is a nice change of pace.  ;)


Check out Whimsy Stamp's entire release! So many fun products!