Tuesday, December 26, 2017

Merry Christmas! ( A Day Late!)

Good morning!
I was supposed to post this yesterday and wish all of you a very Merry Christmas.....but well I got a present of the flu instead. 
Bummer.
Fortunately it only lasted a day and a half and I seem to be pretty much back to normal!
I created this card with this adorable MFT stamp.  She was colored in with Copic markers. 
I masked her and used a snowflake stencil and inks behind her.  I added glossy accents and loads of glitter.  For a final touch I tied pink/white twine with jingle bells, and a sentiment from SRM's Stickers by the Dozen/Gingerbread Boy.
I really do hope you all had a very Merry Christmas! 
:)

Sunday, December 24, 2017

Merry Christmas Eve!

Good morning! Merry Christmas Eve to you!
I have a few quiet moments before the kids get up (yes, they are BOTH home!) and get moving! 
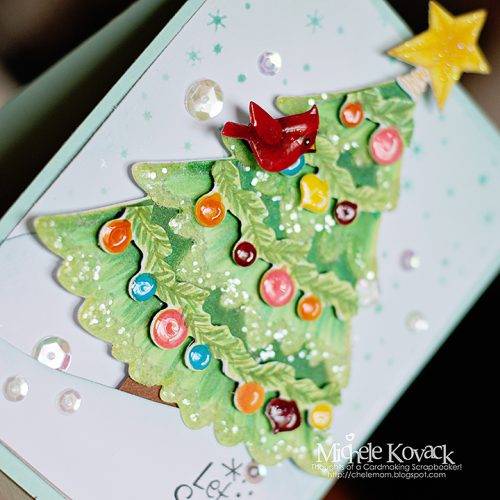
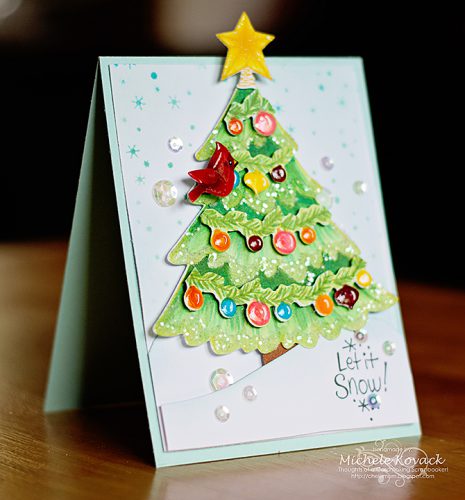
I created this fun card for the Scrapbook Adhesives blog and a Stampendous stamp. (Unfortunately, the set is no longer available) The Christmas tree was colored with Copic markers.  There are several dies that come with this set and I used it for the garland, cardinal, and star.  I added plenty of glossy accents and glitter too!
Christmas Tree Holiday Card Making by Michele Kovack for Scrapbook Adhesives by 3L
I wanted a bit of dimension so I popped the bird and star up using Crafty Foam Squares.  I held the sequins in place using Dodz-mini.  
I am keeping it short today! (like me!)
I will be back tomorrow with a card for Christmas! Hope you can have your morning coffee with me before you start your day!

Tuesday, December 19, 2017

A Little Somethin' Somethin'

Good morning! I am up on the SRM Blog today with a quick little gift idea!
I am a 4th grade teacher and like to get my co-workers a little somethin'
Food is always a good gift right? ;)
I grabbed a few of these glass jars from my over stocked basement full of crap stuff! 
I added two strips of double sided tape and rolled them in glitter. 
I added a bow I cut from my Silhouette and a cute sticker from SRM, appropriately called Gingerbread Stickers by the Dozen. Add a bit of food to the container and BAM, you are done!
This is my last week of school before our two week break.  The students and staff are heading out to the movies today to see Ferdinand and the Bull. It's always a lot of fun!
Have a great day!!

Monday, December 18, 2017

Shaker Ornament!

Okay folks, it's getting real now. 
Christmas is less than a week away.
Am I freaking out a little bit?  Possibly.
Is my shopping done? Nope.
Is my baking done? Nope.
Am I in the Christmas spirit? Absolutely!

I created this shaker ornament using Spellbinder's dies, acetate, a Fancy Sentiments Sticker from SRM, and these cute little fillers from Queen and Co.
The Poinsettia was cut using a Spellbinder's die and giving it swipes of color with a Copic marker.  I dabbed a bit of glue in the center and added more of the solid beads from Queen and Company.  Everything was glued to the top of the ornament. 
Thanks so much for stopping by!
Deep breaths people.....deep breaths! 
;)

Thursday, December 14, 2017

Coffee Lovers Blog Hop!

Good morning! 

So I am glad to be participating in the Coffee Lover's Blog Hop!
I used this cute little Coffee Plans stamp set from SRM Stickers!
For my card, I wanted to create a background using the coffee cup.  I stamped it in a brown ink and used Prisma Colored pencils.  I added a sentiment from the Stickers by the Dozen collection across the front.  I tucked a red die cut leaf behind it.  (After the leaf had been given a coating of glossy accents and glitter!)
I added a bit of rustic twine tied into a bow.  I scattered several gems and stars from Queen & Co.to the front. 

I rounded the back panel's edges on two sides and adhered the entire front to a kraft card.

Thank you all for stopping by!  I appreciate your visits!

Sunday, December 10, 2017

Vintage Rusty Lid Ornament!

Good morning! I hope you are having a fabulous weekend!
I am up on the Scrapbook Adhesives blog today with a vintage ornament.  Over the years my style has evolved, but vintage still makes my heart flutter.
Over the summer I take lids from candles and soak them in vinegar water.  You can do this with silver jingle bells too! I leave them all summer until they are beautifully rusted! I die cut a circle to fit inside, sponged ink on the edges, and stamped the image in black. I colored it using Copic Markers. I added a bit of glimmer using a Wink of Stella pen.  
I didn't want the image to sit too far inside the lid, so I used Scrapbook Adhesives Crafty Foam tape.  I stacked 3 layers under the image and adhered it in place.  I used the Dual Tip Glue pen to add the glittery snow underneath her. 

I die cut the poinsettia using a Spellbinder's die.  I colored it with Copic Markers and then gave each layer a coating of glue using the Dual Tip Glue pen.  I sprinkled it with glitter.  I assembled the flower and wanted it to sit up on the lid, so I once again, used the Crafty Foam Tape underneath it.  I added some gems (Queen & Company) and dots of silver Stickles around the perimeter.  
Have a wonderful Sunday! Thank you for popping by!

Friday, November 24, 2017

No Line Coloring!

Good morning! I hope you had a wonderful Thanksgiving!
It is so hard to believe that we are officially in the holiday season!
I am up on the Scrapbook Adhesives blog today with another no line coloring card.  I had used this same stamp set by Prima before to create a birthday card. You can see that one HERE.  I loved it so much that I wanted to make a winter themed card. I stamped her with a pale brown ink and colored the image with Copic markers. I stamped some snowflakes and the sentiment.
I adhered the layers of card stock using  E-Z Runner® Permanent Strips.I added a few Petite Posies from Queen & Co,  using Dodz-micro Adhesive Dots.  I also added a vertical bow tied with jingle bells.  To prevent them from flopping around, I secured them with Dodz-Medium Adhesive Dots. 
I hope you have a wonderful weekend!  Get LOTS of shopping done! :)


Thursday, November 16, 2017

Shaker Teacher Card!

Good morning!  
It's been awhile....life has been crazy ( I think I say this a lot lately!) 
We are extremely involved in Cortney's group home, Misericordia.  Her dad an I serve on the board and I came up with an idea to create jewelry for the families.  I had worked with a local jeweler for over a year.  So with the holidays approaching we are attending numerous events and selling our jewelry.  (Proceeds all benefit Misericordia)

So crafting has been pushed aside lately.
I did manage to make a card for the SRM Blog though.  I used bits and pieces for the shaker portion, from Queen and Co
The apples were stamped on an oval frame from the Healthy Plans Clear Planner stamp. Each one was colored with Copics. I gave each apples a coating of glossy accents.  Once it was dry, I used the White Reminisce gel pen to give the apples a highlight. 
I used a teacher sticker from the Quick Cards Back to School set. 
I appreciate you stopping by today

Friday, November 10, 2017

Christmas Shaker Card!

Good morning! I hope you have had a great week!  
I am up on the Scrapbook Adhesives blog today with this Poinsettia shaker card.
A bit of crafty foam tape, acetate, and some fun shaker elements from Queen and Co!

I layered and assembled all of the pieces.  I cut a Poinsettia flower using a Spellbinder's die.  Copic markers gave it a bit of color.  It was adhered to the corner using Dodz Adhesive Dots. 
 I also added a bit of silk ribbon tied with silver twine. 


For more detailed information about the products used and how this card was made, please be sure to stop by the Scrapbook Adhesives Blog!

Thank you for stopping by!  I appreciate it very much!

Tuesday, November 7, 2017

Christmas Topiary-Handmade Holidays Blog Hop!

Blog Hop 2017 Banner Idea 2.jpg
Good morning my fellow crafty peeps! I am excited to be participating in the Handmade Holidays Blog Hop!  Today I have a  Christmas Topiary! I have a friend who LOVES pink and I thought I would make her a tree to match her craft room!  
The base of the tree is a flower pot that is so sparkly in real life! 
And since I am a girl who is all about the sparkle, why not make the star on the top of the tree shimmer too?

It was an easy project to make and here are some of the supplies you will need. 
1. white paint
2. Pink paint
3. flower pot
4. cardboard cone
I painted the pot white and the cone pink.  You may be wondering why since it was going to be covered with flowers.  I like to do this to camouflage any gaps there might be.
These were the colors I used on my tree!  Who says you have to make them green?

I used Scrapbook Adhesives Dual tip pen to assemble the flowers and add silver micro beads to the centers. I did this in assembly line fashion! Once the flowers were dry ( I waited until the next day) I used a hot glue gun to adhere them to the cone. 
Dual Tip Glue Pen,  Home and Hobby, 3L Corp Adhesive
I cut two stars using a Spellbinder's star die. I used a sheet of music note scrapbook paper to add a vintage feel to the project. 

I gave each star a coating of glossy accents and sprinkled Diamond Dust glitter over it. 

I adhered them to a wooden dowel and used clips to glue it into place until it was dry. 
I added a silk ribbon. 
I glued the star/dowel to the opening at the top of the cone.  


I am so glad you were able to hop along with us! 
Hope you leave here inspired!


Wednesday, October 25, 2017

Quietfire Designs and Scrapbook Adhesives by 3L

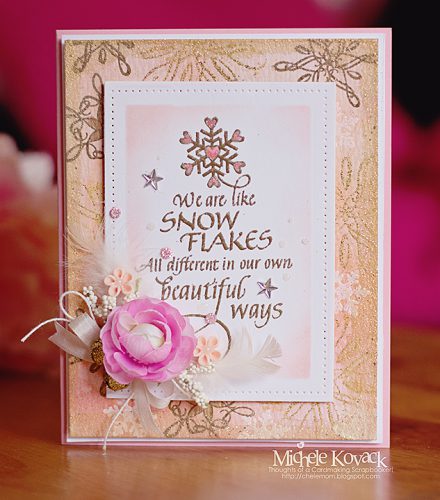
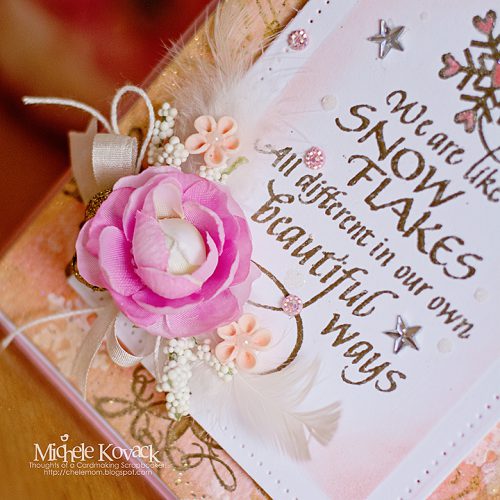
Good morning!  I was up on the Scrapbook Adhesives blog yesterday with a card I created using stamps from Quietfire Design. The sentiment is in such a gorgeous font!
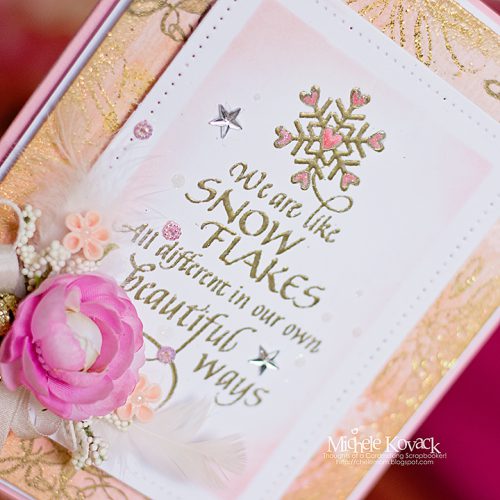
I die-cut the sentiment and left the die in place to ink a bit of pink around the edges. Set it aside to work on the background by stamping several snowflake stamps and heat embossed them in gold and white. After sponging pink ink around the entire background, layer the sentiment panel over the background using Crafty Foam Tape. Then continue to layer the card panel with white and then pink cardstock, using Crafty Foam Tape.
To embellish the sentiment card panel, I added a cluster of flowers, feathers and ribbon with a few sequins. For the larger flowers, I secured it with Adhesive Dots Medium and Adhesive Dots Micro for the teeny gems.
I colored the snowflake at the top with a pink Copic marker because I wanted to bring a bit more of the pink color in.
Thank you so much for stopping by today!!

Friday, October 20, 2017

Pumpkin Treat Boxes!

Good morning!
Michele here with some fall treats!
I think these little clear boxes are so dang cute!
I took a piece of burlap and adhered it to the outside of the box.
I cut a bunch of pumpkins with my Silhouette. I inked the edges and layered them using Crafty Foam Tape.   I did a bit of Copic coloring on the leaves and layered everything on to the top of the box.  I added a sentiment from the Express Yourself Halloween Sticker set  I even cut out the teeny candy corn and adhered it to a clear button.
I tied the black and white twine and tucked the sentiment underneath and glued the button/candy corn to the top.  
My boxes are all ready for my co-workers to receive, for a little sweet pick me up!! 

Have a great weekend!

Monday, October 16, 2017

The No Line Coloring Trend Continues! Macaroons!

Good morning and happy Monday to you!
I am literally obsessed right now with no line coloring.  I chose this set from Jane's Doodles, Tea Time.  I adore the macaroons in this set.  I did lots of masking and used my mini misti to line them up.
I did change my coloring medium to Prisma Colored Pencils.  I was at a charity crop a few weeks ago and wanted to pack light.  So all I brought were stamps and Prisma pencils.  When I got home I assembled my colored images into a finished card. Do you see the little stars around the image? That was due to my Mini Misti being dirty with black ink and me smudging the background with specks of black.  So I had to disguise it.  No way was I throwing all of my hard work away!  So I added more black specks with a Sharpie and glued tiny gold stars on.  Distraction works every time! HA!  I tied a long silk ribbon from the Stamp Simply store and added a mini pink flower from Queen and Company
Thank you all for stopping by! Have a great day!

Saturday, October 14, 2017

Harvest Mice and More No Line Coloring!

Good morning!
It is a very gloomy, rainy day here in Chicago. 
I am heading out the door soon to pick up Cortney. We were invited to a charity bowling event tonight for her best friend, Patty.  It will be great seeing her and even greater that she gets a chance to catch up with her "old" friends!

I absolutely adore this stamp set from MFT called, Harvest Mouse. I also LOVE the look of no line coloring and am thoroughly hooked!  I did a bit of masking so my mice were behind the piles of leaves. 
I colored the image with Copic Markers.  I used my Mini Misti to line up my sentiment so it wasn't wonky!  I added a bit of polka dot paper and red gingham ribbon. For my final touches I used glossy accents on the cherries, and my Wink of Stella pen for the leaves. 
Thank you so much for stopping by! Have a great weekend!
PIN ME! 

Friday, October 13, 2017

House Warming Cards and Bags

Good morning! I am sharing a  couple of cards and gift bags that I thought would be perfect for enclosing a gift card for a new home owner or a recent college grad! 
I used my Silhouette to cut the silhouettes! I adhered a dream sticker from the Everyday Life collection.
I added a few sequins and some glitter glue to the heart.
I am in love with these cute striped bags!  I added a silhouette and a sentiment from the Everyday Life collection. I wanted the word, Life to stand out, so I colored it with a pink Copic marker. 
I am loving the colors here of mint green, turquoise, and hot pink! 
I did the same set but used the pink polka dot bags instead and a slightly different color combination. I used the same sticker for the bag and again colored it with a pink Copic marker.  
Pink and baby blue....doesn't get much sweeter!
Thank you so much for stopping by today!!