Friday, July 22, 2011

My Party Card!

Click HERE to enter my giveaway! : )

What a busy whirlwind of a week it has been! Between CHA and some commitments at home, it has been a bit crazy! I am also walking this weekend to help with the American Cancer Society. A few years ago a fellow teacher died from pancreatic cancer. It greatly affected our school community and since then my co-workers and I have been participating in the walk. It feels empowering to know that we are doing something.....helping in some small way.

Today I have a fun card that uses bits and pieces of two brand new Crafty Secret's sets, Born to Fly and Let's Hang Out!. It was created from scraps of stuff on my desk. Sometimes papers are side by side from two prior projects and suddenly I look at them differently, and think, "Hey!" they look pretty good together! It is a bit brighter than my normal, and I took a little risk with the aqua trim.......but it's growing on me....and I think I kinda like it!
There are lots of layers on this card........I love the dimension that was created to nestle the little party hat!
The hat was colored with my Copic Markers and cut out. I used glossy accents to give it a bit of shine. The twine.....which is seriously my favorite right now, is by Pink Paislee.
I hope you enjoy your weekend! Thank you for stopping by and leaving a little "love!" It always brightens my day to read your comments!

Tuesday, July 19, 2011

What's New with Provo Craft?


Click HERE to enter my Blog Candy!
(Drawing ends on July 29th)


Good morning! I have been walking the CHA floors taking photos for the Cricut Circle Blog! If you are part of the Circle be sure to check out the blog for lots and lots of photos! Not part of the Circle? Click HERE to join! : )

This is the newest to the Cricut family... the mini. It is to be used in conjunction with the Cricut Craftroom and is not a stand alone machine. Can't wait to get to play with this one! : )

And this is The Craftroom!
I will get back to my "regular" crafty schedule tomorrow! I need a little break, and Kyle and I are going to see the Harry Potter movie today! Can't wait!

"See" you tomorrow! Have a great day and stay cool! : )

Monday, July 18, 2011

Crafty Secret's DT Tutorials!

Click HERE for my Blog Candy!
(Scroll down to enter. Drawing ends on July 29th)

Good morning! I am loving all of the input everyone has been giving me regarding what types of tutorials you would like to see! It definitely gives me some direction and ideas for the future! So keep those ideas coming! : ) It is ironic that today is the Crafty Secret's DT Tutorial Hop! Each designer has a unique tutorial for you today! : ) My tutorial is using a brand new Crafty Secret's set called, Vintage Silhouettes and airbrushing with Copic Markers to create a sunset.
I love silhouette images, and this one is particularly sweet! It is the epitome of childhood!


Are you ready to begin? First, these are the supplies you will need to get started.
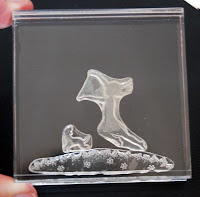
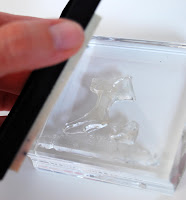
I love working with Crafty Secret's stamps because it easy to position the stamp on the acrylic block for precise placement.
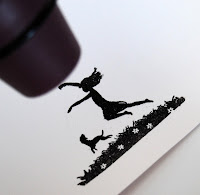
I used Versamark to ink up my image.
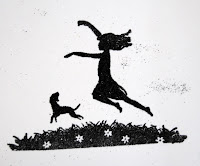
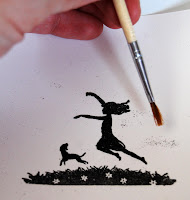
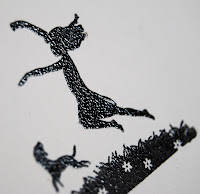
When using black embossing powder it is common to get a bit of splatter around the image.
I use a soft paint brush to brush away the excess powder.
Next, heat emboss image.

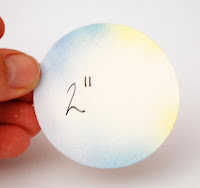
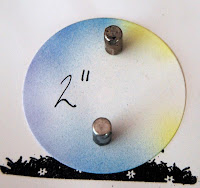
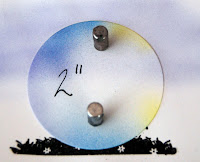
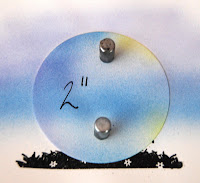
Punch a 2" circle from scrap paper.
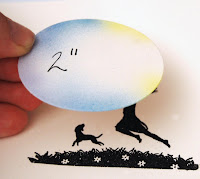
Place it directly over your embossed image.
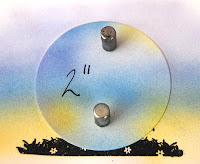
I use magnets to hold the circle in place.
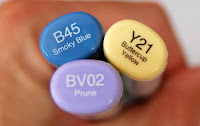
These are the 3 Copic colors I used to create my sunset. But feel free to experiment with different colors. I usually Google Sunset images to see the wide spectrum of colors and their placement.
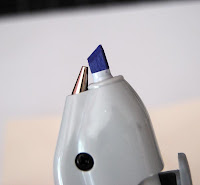
When working with the Copic Airbrush system be sure the chisel end is facing this way.
I worked my way from top to bottom starting with purple.
Then blue, overlapping the colors a bit.
Lastly, comes yellow, remembering to overlap the colors a bit.
Take your circle off and Voila! : )
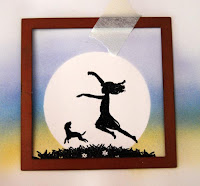
I used Spellbinder's square die to cut out my image. Notice I lined it up, so the grassy hill wasn't crooked.
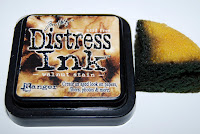
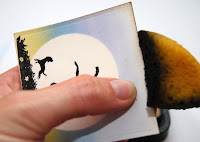
After cutting out the image, take distressed ink and a sponge and apply it to the edges of the square.
Like this! : )
From there I just assembled my card, added some pretty ribbon, rhinestones, and a Prima flower. I am going to try my hand at a video soon.....but I am a bit intimidated to try it! But I do think that would be easier than trying to take a zillion pictures! I hope you enjoyed my tutorial today! Be sure to check out the rest of the DT's!

I am headed to CHA today! I am excited to see all the wonderful new products and see some crafty friends! : )
Have a great day!!!!

Sunday, July 17, 2011

Moxie Fab Tuesday Trigger!

Click HERE to enter your name for BLOG CANDY!

Happy Sunday to you! I have to make this a quick post because my hubby is on his way home from golf and we are headed to our pool for a swim with the kiddos! I had about an hour this morning to create and I knew I wanted to use the new Crafty Secret's stamp set called, Let's Hang Out! I thought it would fit perfectly with this week's Moxie Fab Tuesday Trigger!
I actually paper pieced the dress using Echo Park paper. The sleeves, ribbon, and pockets were stamped on cream card stock and colored with Copic Markers. I added a bit of pink Stickles to the polka dots. I love these little wire hangers that I've had in my stash forever! I dabbed a bit of white acrylic paint to age it a bit. I used some Prima flowers, a doily, twine from Pink Paislee, and designer paper from Crate paper for the background.
I used yellow as my main color but thought it needed a bit of a "punch." So I added bits of pink! I figured I was safe, since the background of the photo had pink in it! : )
That's all I have for you today! I am off to spend some Sunday time with the family! Have a great one!