Monday, December 26, 2016

Merry Christmas Shaker Ornament!

I hope you all had a very Merry Christmas!  I know I did! I feel so blessed to have my little family to share the holidays with. :) 
It has been an incredible year for our family for sure!  Cort moved to Misericordia, Kyle is away at college, Brian and I traveled to San Francisco, New York, and we are heading to Nashville for New Year's Eve.  On top of that, Brian started a new job a few weeks ago.  It was scary and exciting all at the same time! I am normally ready to usher the new year in, but I am okay lingering in 2016 for as long as possible! ;)
I have another ornament that was on the SRM Blog yesterday.  It is a shaker ornament using dies from Spellbinders and Tim Holtz inks for a bit of soft color. 
I added veins to the poinsettia using a white gel pen.  I added a Christmas sentiment from SRM as a final touch.
Cort is home for a few more days, so we are taking her and Kyle (because he is a good "big" brother) to see the movie, Sing.  We are trying to cram as much family time as we can before regular life kicks in again.  ;) 
Thank you for stopping by today!
Have a wonderful Monday!

Saturday, December 24, 2016

Rusty Lid Ornament!

Good morning!  I have a few minutes before I start cleaning and getting my house ready for company today. :) I am up on the Scrapbook Adhesives Blog today with another rusty lid ornament.  It provides such an interesting back drop! I used The Dual Tip Glue Pen to adhere the mica flakes to the perimeter of the lid as well as the doily in the back.  My flowers were cut using water color paper and dies from JustRite.  I gave them color using my Zig Clean Color Markers.  I layered everything using 3D Foam Squares.  
The sequins were added using Dodz-small.  I punched a hole at the top using my Cropidile and threaded rustic twine through it. 

I will be back tomorrow with another ornament!  
Merry Christmas Eve to you and your family!

Wednesday, December 21, 2016

Christmas Countdown!

Good morning!  Are you ready for Christmas?  Do you have any last minute gifts to buy?  
I am in pretty good shape this year and have felt more relaxed about Christmas then I have in a very long time!  And that means more time in the ole' craft room!
I bought bunches of Suzy Plantamura's images over the summer and was excited to break open the Christmas pack!
I colored everything with Copic markers and added a few details with a white gel pen and some glitter.  A simple ribbon at the top was all this fun card needed! 
Kyle is home and Cort comes home tonight.  My last day of school is today and I get the pleasure of hanging out with my kids for the next week! 
Thank you for stopping by today!

Monday, December 19, 2016

Water Colored Ornament!

Good morning and happy Monday to you! It is cold and snowy here in Chicago! It makes me want to cozy up in my home and craft! But duty calls and I need to get my booty to work....ugly Christmas sweater and all! ;)  I found a bit of "me" time this weekend and created several ornaments.  
This one uses a die from Spellbinders called, Heirloom Ornaments.  I used Tim Holtz inks on the smaller ornament piece in shades of orange, yellow, and red.  


I then layered a Tim Holtz stencil over both pieces and applied texture paste.  I sprinkled it with glitter while it was still wet.  I used Scrapbook Adhesives foam tape between layers for a bit of dimension.  I added a Just Rite Poinsettia die cut to the top.  It was given a wash of color with my Zig Water color markers.  I added a big white pom pom to the center and couple of jingle bells. 
I added an SRM sentiment as my finishing touch.  I love seeing all of the ornaments I've made through the years decorate the tree!  (Among my kids' homemade ornaments that they made me as little ones!)


Have a wonderful day! 
Thank you for stopping by today!

Wednesday, December 14, 2016

Blog Hop With Bo Bunny!

Scrapbook Adhesives & Bo Bunny Press Blog Hop Dec 2016 Logo
Good morning!  
I am excited to be a part of the Bo Bunny and Scrapbook Adhesives Blog Hop!
I used these cute papers, Kiss the Cook, from Bo Bunny.  I used my Silhouette to cut the mixer shaped card.  I used Scrapbook Adhesives 3D foam tape for the layers as well as stacking my flower. 
 
I attached my sequins using Dodz Mini.  (So much easier than messy wet glue!)
I wanted to add some additional "frosting" to my mixer, so I used liquid applique.  I did several layers so that it was nice and thick.  While the liquid applique was still hot, I sprinkled glitter over it.  
I am so glad you stopped by! Be sure to pop on over to the Scrapbook Adhesives and Bo Bunny blogs for a chance to win prizes! 
Have a great day!!


Tuesday, December 13, 2016

Eskimo Kisses!

Happy Tuesday to you! 
I love making ornaments to give away to friends and family (and some to keep)! I pulled out an old set from Crafty Secrets and stamped the image in grey on kraft card stock.  I wanted to try my hand at "no line" coloring.  (Not sure I really succeeded).  I used my Prisma Colored Pencils.
I cut the image out with a die from Tattered Rose.  I threaded a bit of string through it. I tied some silk ribbon from the Stamp Simply Store, with a jingle bell, and adhered it to the corner of the circle.  I dipped the edges of my circles in glue and added some glittery flakes.  

This week is spirit week at school! Yesterday we wore our holiday hats and today is crazy sock day!
I love this time of year when the kids are excited and anticipating Christmas!  I think I appreciate it even more now that my own kids are grown. :)
My own kiddos come home next week for the holidays too.....so all is good in my world!
Have a wonderful day my friends!

Saturday, December 10, 2016

Christmas Ornament using 3D Foam Shapes!

Good morning! I am full swing into Christmas mode these days.....decorations up, shopping done, presents wrapped, Christmas crafts created, and now the start of all of the holiday parties begins! It's always such a fun, but hectic time of year.  :)
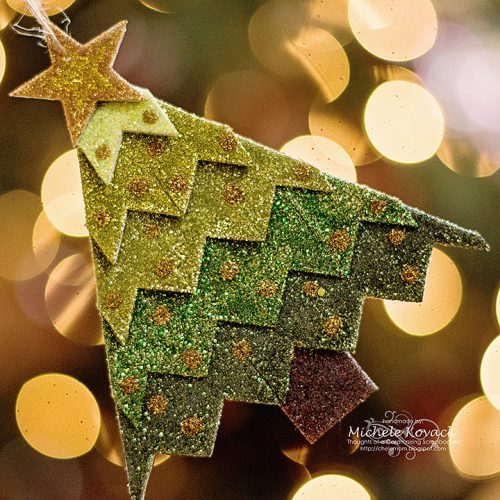
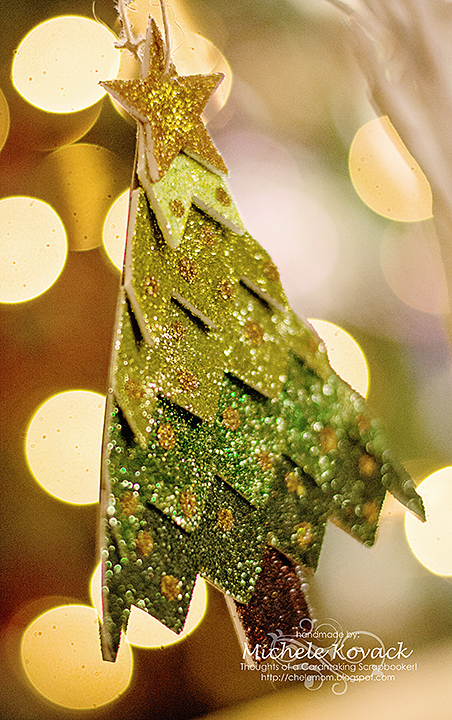
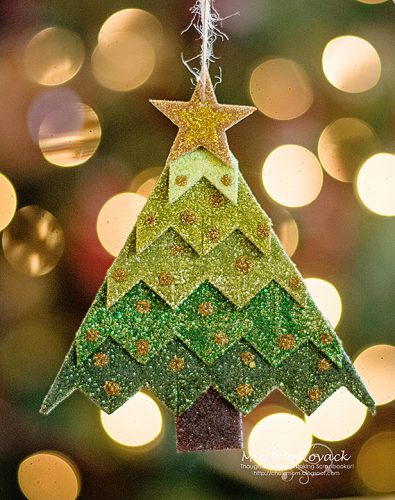
I am up on the Scrapbook Adhesives by 3L blog today with a complete tutorial on how I created this ornament using 3D Foam shapes.  (And of course, bucket  loads of glitter!)

banner-tree-ornament2
banner-tree-ornament3
banner-tree-ornament
I so appreciate you stopping by! I hope you have a wonderful weekend!

Sunday, December 4, 2016

Clear Shaker Ornaments!

Good morning!  I apologize for my absence!
My kiddos were home for the week and we were trying to cram in lots of family time. :)
I am up on the Scrapbook Adhesives blog today with a tutorial on how I created these two clear shaker ornaments. They were so much fun to make!

And this is my reason for not posting all week! 
I am volunteering at Misericoridia today.  Every year there are about 20 of us who volunteer to bake in their bakery.  My best friend who passed away 7 years ago's sister coordinates this every year in her memory. It reminds me how incredibly blessed I am.

Thank you for stopping....this gal is ready to put her hair net on and roll some cookie dough! 


Thursday, November 24, 2016

Give Thanks....

Good morning!
Today's card is my last fall card for the year.
Then you will see lots of snowmen, ornaments, and Christmas trees!
I used a Tim Holtz stencil and inks to create the background.  I added white veins to the leaves using white gel pen.  I spritzed it with Goosebumpz spray to add "water" droplets. SRM's sentiment from Live Life/Calendar Year was perfect for this card.  Gold sequins and sheer ribbon finished it off. 
My kiddos are still sleeping......and love that they are both home in their own beds. 
My heart is complete.
Today I will have a full house, good food, and a warm house to share with my family.
I am so incredibly grateful for all that I have, (including you! and this wonderful hobby!)
I hope you have a wonderful Thanksgiving!

Monday, November 21, 2016

Harvest of Blessings

Good morning friends!I have a quick fall post for you today!  (I am still in disbelief that Thursday is Thanksgiving already!) 
I made a treat bag using My Favorite Things Harvest Mouse stamp set. I masked off the moon/mouse/leaves and inked it with various shades of yellow, orange, and red.  I colored the main image with Prisma Colored Pencils. 
I added stars and highlights with my white gel pen as well as few craters to the moon!
A doily was glued to the inside.
It is all ready for treats to be placed inside!
Both my kiddos come home this week! It will be such a blessing to be surrounded by my family!
Thank you so much for stopping by today!

Wednesday, November 16, 2016

I Pick You!

Good morning! 
Today I have a little treat envelope using this cute stamp set from My Favorite Things.  The set is called, Harvest Mouse.  I stamped it on a tag and I colored it with my Copic markers. 
I added some glittery clouds around the sentiment.  I stamped additional leaves on the bag and colored those with Copic markers as well.  I ribbon and button were the finishing touches.  
I know this is a crafty blog and you may want to throw tomatoes at your computer screen that I am posting about this.  But 4 months ago I decided to become a consultant for Rodan + Fields.  I looked at it as a great business opportunity, but quickly fell in love with their skin care products!  Here is a little background about this amazing company.  Rodan + Fields was started by the same doctors who created ProActiv.  They now offer four regimens for the most common skin problems such as, wrinkles, sagging skin, large pores, acne, redness, sun spots etc. I knew that my skin felt better, but until I came across my old school picture, from TEN years ago, I hadn't realized how much better my skin looked.  The picture on the left is me at 35 and the picture on the right is me today, at 45 years old.  My acne is cleared, redness gone, wrinkles kept at bay.....
Until now, I did not feel good about my skin. I caked the foundation on trying to hide my skin. Now....no foundation. None. Nada, Zilch. 
If you are interested in learning more about Rodan + Fields please feel free to email me.
chelemom71@yahoo.com
If you would like to see which skin regimen is right for you, click HERE!
The holidays are fast approaching! 
Do you love your skin?
Thank you for letting me share!!


Thursday, November 10, 2016

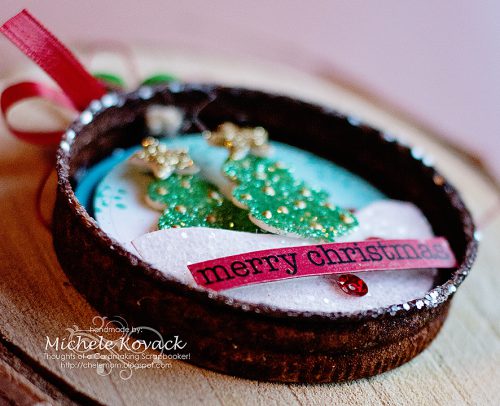
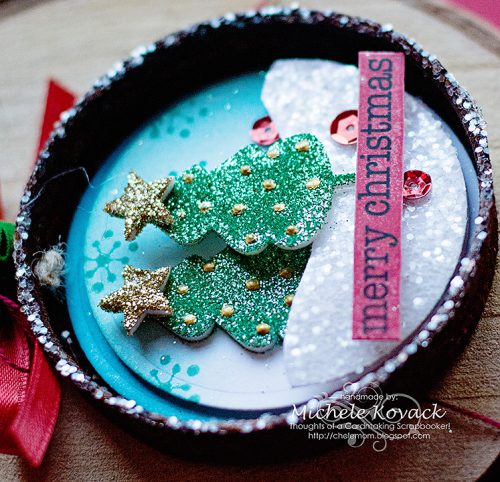
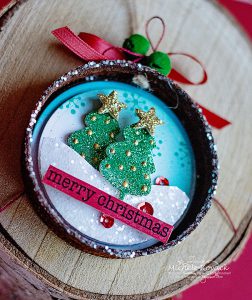
Christmas Ornament Using a Rusty Ball Jar Lid!

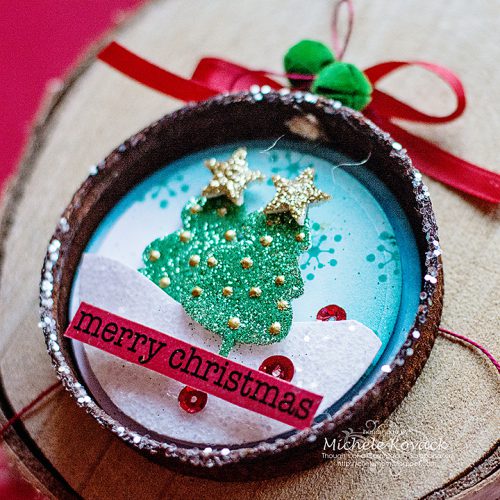
Good morning!I am up on the Scrapbook Adhesives by 3L blog today with a Christmas ornament.  
Every summer I take a handful of Ball Jar lids and a package of silver jingle bells, and soak them in vinegar water.  They sit about 4 months or so.  I keep them on hand for my vintage projects all winter long! 
ornament2
I die cut one large circle and two smaller circles.  I inked and stamped two of them and layered them inside the lid using Crafty Foam Tape.  The third (and top) circle was cut in half with some peaks and valleys to emulate a snow drift.  I used a Dual Tip Glue Pen to adhere the glitter. This was placed on top of the other two circles using Crafty Foam Tape.
ornament5
I took two trees from the 3D Christmas Mix pack and glittered them in green.  I added gold dimensional paint to each tree.  I added stars from the 3D stars package and glittered those in gold.  
ornament3
I used a sentiment from SRM stickers for the bottom. The sequins were tacked down with Dodz-small.  I tied string, ribbon, and two jingle bells (not the rusty ones though!) to the top of the ornament. 
ornament
Thank you for stopping by today! I have a busy weekend ahead with my scrapbook girls and a black tie affair on Saturday! 
Have a great weekend my friends!

Tuesday, November 8, 2016

Heartfelt Thanks! (Pie Box #2)

Good morning!  I have take two on these fun pie boxes I found at the Dollar Spot at Target!  Since Halloween has come and gone, I moved on to the next holiday....Thanksgiving! 
I stamped this cute image from Hampton Arts on a tag and colored it with my Copic Markers.  The pie box was given a bit of interest with a stencil from Tim Holtz. I added a doily, ribbon, and a few sequins to finish it off.
I love your visits and appreciate you stopping by!
Thanks for making me a part of your day!

Monday, October 31, 2016

Happy Halloween!


Happy Halloween my friends! Today I have a fun treat box to share with you!  

Does anyone else love the Dollar Spot at Target? I just can't help browsing through all of their cute things!  I picked up a package of precut pie boxes.  
They are perfect for sneaking some treats into!
I applied glue to the top of the box and sprinkled on glitter to resemble candy corn. I topped the box off with a die cut flower that was colored and heavily glittered. (A Spellbinder's poinsettia die was used here!)  
A few leaves, twine, and of course a Stickers by the Dozen Halloween sentiment from SRM!

Halloween is notoriously crazy.....but fun at school! I love seeing the kids get dressed up in their costumes!  So off I go....dressed as an emoji! Pictures to follow later this week!
HAPPY HALLOWEEN!!

Sunday, October 30, 2016

Witching You a Happy Halloween!


Good morning and happy Halloween Eve to you!  I have been slowly getting back to my crafting as the weather is turning rainier and cooler.  I bought this cute stamp set from Hampton Art! I stamped the images onto water color paper and did lots of masking here with my Mini Misti.  I cut a circle from masking paper and used both the negative and positive cut to create the night sky.  I also masked the cat and broom to make it appear that the cat was sitting on the broom.  I colored the cat and broom using my Zig Clean Color Markers. 

I also added a few stars  and the sentiment.  I love that I can line everything up perfectly with the Misti!  (No more wonky sentiments!) I tied some ric rac to the top and added a scattering of purple sequins to match the cat's hat. 
Tomorrow will be a crazy day at my school!  Halloween always is! But the students and teachers all have a great time getting into costume!  I will share pics later this week!
I will be back tomorrow with a treat box perfect for Halloween goodies!
Have a great Sunday!


Monday, October 24, 2016

Scrapbook Adhesives and Graphic 45 Blog Hop!


Scrapbook Adhesives by 3L and Graphic 45 Blog Hop OCT16 Logo
** So sorry this went up late!  My preset time did not work today! ooops!**
Hello! I am so excited to be hopping along with Graphic 45 and Scrapbook Adhesives by 3L Blog Hop!  I have a fun altered Graphic 45 ATC Book Box that can house some fun birthday items! I covered the box with coordinating papers from the Safari Adventure Collection. I used Extreme Double-Sided Tape 1/2″ to hold everything in place.  I love the Ornate Metal Label Holder and thought it would be perfect to accent the front of the box.

The burlap on top of the box and the label holder were adhered with the Dual Tip Glue Pen. The box is closed with a piece of rustic twine I had in my stash. I die-cut various animal silhouettes and long grass shapes to place on the top of the box using the Enchanted Forest 6 x 6 Pad. Then adhered all the pieces to the top of the box, along with berries and a little flower. An animal inspired gem was added using Dodz Adhesive Dots Medium on the bow twine. A sentiment sticker was placed on a strip of paper, folded at the bottom and glued to the box in a pop-up style.

Be sure to stop by the Graphic 45 and Scrapbook adhesives by 3L blogs for your chance to win some great prizes! 


Monday, October 17, 2016

Love Me Some Halloween!

Good morning! Did you have a great weekend?
I had another busy one filled with "gallivanting" as my family likes to call it! ;) At the rate I am going, I will probably be two sizes bigger! 

A couple of weeks ago I bought this adorable stamp/die set from Hero Arts at Simon Says Stamp.  I created the background panel for both cards using a combination of stamping and Zig Clean Color Markers.  I added a bit of Black Soot Distress ink to the edges too.
The boots were cut out using the coordinating die and each image was colored with colored pencils.  I heat embossed the sentiment on black paper in orange.  For a finishing touch, I adhered a few sequins.
Brian and I had a family meeting at Misericordia yesterday, so I wanted to bring a few things to Cort, like her Halloween costume, Halloween T-shirts, pumpkin shoes, and matching headbands. 
I had a moment packing her stuff yesterday of sadness.  
This will be the first Halloween she doesn't spend with me.
I've been lucky to share 20 of them with her.

I know it is part of the growing process.....but it certainly wreaks havoc on this mama's heart.

Brian keeps me busy....so I don't notice her absence as much...hence the gallivanting! 
;)


Monday, October 10, 2016

Thankful Heart

fall9
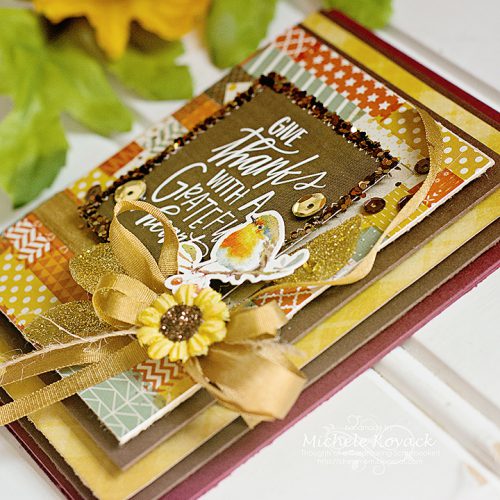
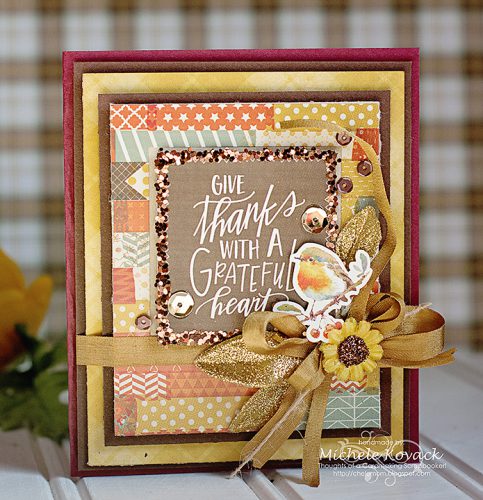
Good morning friends! I am up on the Scrapbook Adhesives by 3L blog today with a fall card! 
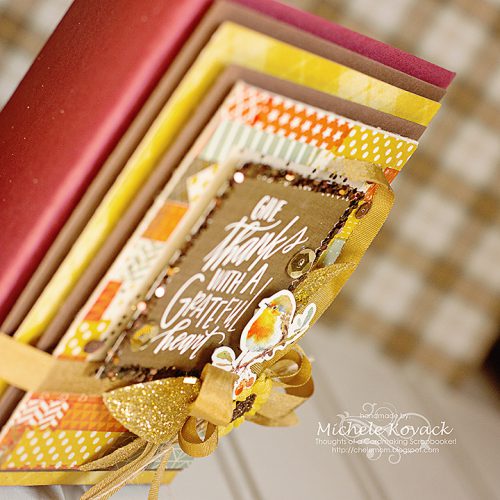
It was a fast and easy card to make because there was no stamping at all! Just pretty papers from Photoplay and a few embellishments. I used Scrapbook Adhesive's Crafty Foam Tape in between each layer.  I love dimension on a card, and this is a great way to get it! I added German Glass Glitter around the perimeter using Home & Hobby's Dual Tip Glue.  I tied the silk ribbon from the Stamp Simply Ribbon store and used glue to adhered the sunflower and glitter leaves. 
fall8
I added a few sequins and the pretty little birdie using Dodz-small.  This card took less than a half an hour to make....which for me is unheard of! LOL! 
fall7better
Thank you so much for stopping by today!
Your visits mean the world to me!