Showing posts with label burlap bag. Show all posts

Tuesday, August 4, 2015

Burlap and Lace

Good morning!
I am off to school today to start getting my room ready.  I know I say this every year, but I can't believe how fast the summer went! 
I still have a couple of weeks that I am going to savor!
I am up on the SRM Blog today with some dressed up burlap bags.
Michele Kovack
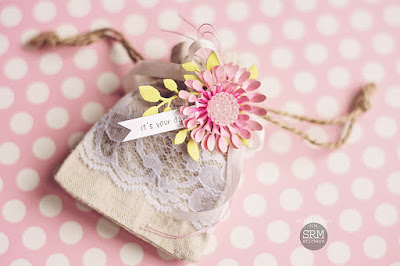
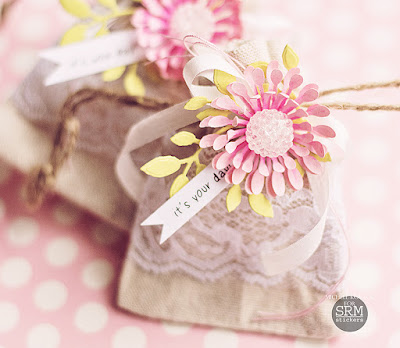
The bags are so deliciously vintage. 
I added a flower from Spellbinders called, Blooms One and leaves cut using Spellbinder's Sprig die.   
Michele Kovack
I also added satin ribbon tied with a soft pink thread.  The SRM sentiment from Stickers by the Dozen, was the final touch.
I thought these bags would be a perfect way to present a Pandora charm.  
Michele Kovack
Thank you all for stopping by today!
I appreciate your spending a bit of time with me!

Tuesday, July 28, 2015

Got Flowers?

Good morning fellow crafters!
Have you seen these new bags from SRM Stickers? I love all things floral, so the minute they arrived at my doorstep, I knew I had to create with them! 
SRM Stickers Blog - Flowers, Flowers, and More Flowers! by Michele - #floralbags #fabricbags #giftbags #fancydoodles #stickers #DIY
They don't need much dressing up, but I knew I wanted to add another flower and a sentiment to the top of the bag. I used Jane's Doodles stamp set called, Fancy Doodles.  I stamped them in Versamark and heat embossed them in white.  I water colored and fussy cut them.  
SRM Stickers Blog - Flowers, Flowers, and More Flowers! by Michele - #floralbags #fabricbags #giftbags #fancydoodles #stickers #DIY
I added ribbon, rustic twine, and a sentiment from the We've Got Your Border (bright) collection. 
SRM Stickers Blog - Flowers, Flowers, and More Flowers! by Michele - #floralbags #fabricbags #giftbags #fancydoodles #stickers #DIY
If you love flowers, these little bags are perfect!
Enjoy your day and thanks so much for stopping by! 

Monday, September 2, 2013

Crafty Secret's Design Team Challenge and Linky Party!

GOOD MORNING!!! :) 
Today is Crafty Secret's Design Team Challenge and Linky Party!  I also have a step by step tutorial on how I created my decorated burlap bag!
I am starting to gear up for fall and my favorite holiday, Halloween. I chose this journal owl image from the Crafty Secret's Halloween Digital set. 
I didn't have any photo transfer paper so I decided to experiment and see if there was a way for me to print directly on muslin.  And the answer to that is, yes!
So here is my Halloween burlap bag all ready to be filled with treats!
I selected my digital image, sized it and first printed it on copy paper.  This told me where I needed to place my piece of muslin. I first adhered the muslin to a heavy duty piece of card stock and then taped both down to the copy paper really well, so it didn't get stuck in the printer.  Once printed, I took my scalloped fabric scissors to cut around the edge. 
I peeled it off the card stock and pulled out my needle and thread.
I wanted my edges to be a bit frayed, so I pulled the threads around the perimeter. 
I glued a bit of lace to the muslin using fabric glue. I wanted to add a flower to my bag, so I decided to dye a swatch of the muslin using purple Glimmer Mist and Walnut Ink.
I wet the fabric first and then sprayed away!  I spread it out on a paper plate and gave it one more spritz of the walnut ink to age it a bit.  If you are in a hurry for it to dry, take a blow dryer or heat gun to speed up the process. 
I used these Papertrey Ink flower dies and my dyed muslin to create my flower.
I tied my seam binding with black string. 
I layered all the pieces onto my burlap bag. I did add some black pom pom trim ,several green felt leaves,  and a button to the center of my flower.  
And here once again is my finished treat bag. :)
Be sure to stop by the other designers for their gorgeous projects and step by step tutorials!