Tuesday, December 26, 2017

Merry Christmas! ( A Day Late!)

Good morning!
I was supposed to post this yesterday and wish all of you a very Merry Christmas.....but well I got a present of the flu instead. 
Bummer.
Fortunately it only lasted a day and a half and I seem to be pretty much back to normal!
I created this card with this adorable MFT stamp.  She was colored in with Copic markers. 
I masked her and used a snowflake stencil and inks behind her.  I added glossy accents and loads of glitter.  For a final touch I tied pink/white twine with jingle bells, and a sentiment from SRM's Stickers by the Dozen/Gingerbread Boy.
I really do hope you all had a very Merry Christmas! 
:)

Sunday, December 24, 2017

Merry Christmas Eve!

Good morning! Merry Christmas Eve to you!
I have a few quiet moments before the kids get up (yes, they are BOTH home!) and get moving! 
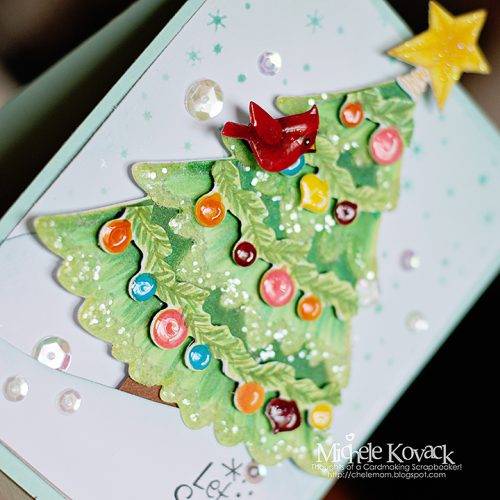
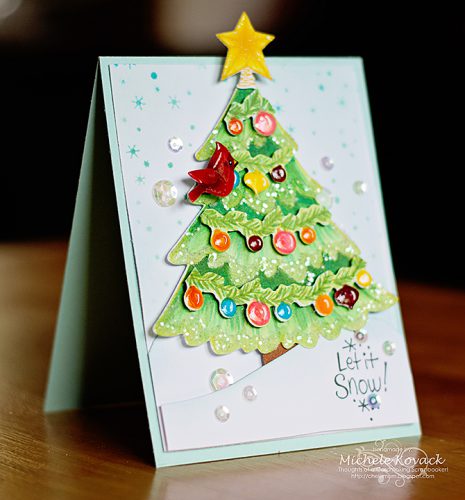
I created this fun card for the Scrapbook Adhesives blog and a Stampendous stamp. (Unfortunately, the set is no longer available) The Christmas tree was colored with Copic markers.  There are several dies that come with this set and I used it for the garland, cardinal, and star.  I added plenty of glossy accents and glitter too!
Christmas Tree Holiday Card Making by Michele Kovack for Scrapbook Adhesives by 3L
I wanted a bit of dimension so I popped the bird and star up using Crafty Foam Squares.  I held the sequins in place using Dodz-mini.  
I am keeping it short today! (like me!)
I will be back tomorrow with a card for Christmas! Hope you can have your morning coffee with me before you start your day!

Tuesday, December 19, 2017

A Little Somethin' Somethin'

Good morning! I am up on the SRM Blog today with a quick little gift idea!
I am a 4th grade teacher and like to get my co-workers a little somethin'
Food is always a good gift right? ;)
I grabbed a few of these glass jars from my over stocked basement full of crap stuff! 
I added two strips of double sided tape and rolled them in glitter. 
I added a bow I cut from my Silhouette and a cute sticker from SRM, appropriately called Gingerbread Stickers by the Dozen. Add a bit of food to the container and BAM, you are done!
This is my last week of school before our two week break.  The students and staff are heading out to the movies today to see Ferdinand and the Bull. It's always a lot of fun!
Have a great day!!

Monday, December 18, 2017

Shaker Ornament!

Okay folks, it's getting real now. 
Christmas is less than a week away.
Am I freaking out a little bit?  Possibly.
Is my shopping done? Nope.
Is my baking done? Nope.
Am I in the Christmas spirit? Absolutely!

I created this shaker ornament using Spellbinder's dies, acetate, a Fancy Sentiments Sticker from SRM, and these cute little fillers from Queen and Co.
The Poinsettia was cut using a Spellbinder's die and giving it swipes of color with a Copic marker.  I dabbed a bit of glue in the center and added more of the solid beads from Queen and Company.  Everything was glued to the top of the ornament. 
Thanks so much for stopping by!
Deep breaths people.....deep breaths! 
;)

Thursday, December 14, 2017

Coffee Lovers Blog Hop!

Good morning! 

So I am glad to be participating in the Coffee Lover's Blog Hop!
I used this cute little Coffee Plans stamp set from SRM Stickers!
For my card, I wanted to create a background using the coffee cup.  I stamped it in a brown ink and used Prisma Colored pencils.  I added a sentiment from the Stickers by the Dozen collection across the front.  I tucked a red die cut leaf behind it.  (After the leaf had been given a coating of glossy accents and glitter!)
I added a bit of rustic twine tied into a bow.  I scattered several gems and stars from Queen & Co.to the front. 

I rounded the back panel's edges on two sides and adhered the entire front to a kraft card.

Thank you all for stopping by!  I appreciate your visits!

Sunday, December 10, 2017

Vintage Rusty Lid Ornament!

Good morning! I hope you are having a fabulous weekend!
I am up on the Scrapbook Adhesives blog today with a vintage ornament.  Over the years my style has evolved, but vintage still makes my heart flutter.
Over the summer I take lids from candles and soak them in vinegar water.  You can do this with silver jingle bells too! I leave them all summer until they are beautifully rusted! I die cut a circle to fit inside, sponged ink on the edges, and stamped the image in black. I colored it using Copic Markers. I added a bit of glimmer using a Wink of Stella pen.  
I didn't want the image to sit too far inside the lid, so I used Scrapbook Adhesives Crafty Foam tape.  I stacked 3 layers under the image and adhered it in place.  I used the Dual Tip Glue pen to add the glittery snow underneath her. 

I die cut the poinsettia using a Spellbinder's die.  I colored it with Copic Markers and then gave each layer a coating of glue using the Dual Tip Glue pen.  I sprinkled it with glitter.  I assembled the flower and wanted it to sit up on the lid, so I once again, used the Crafty Foam Tape underneath it.  I added some gems (Queen & Company) and dots of silver Stickles around the perimeter.  
Have a wonderful Sunday! Thank you for popping by!

Friday, November 24, 2017

No Line Coloring!

Good morning! I hope you had a wonderful Thanksgiving!
It is so hard to believe that we are officially in the holiday season!
I am up on the Scrapbook Adhesives blog today with another no line coloring card.  I had used this same stamp set by Prima before to create a birthday card. You can see that one HERE.  I loved it so much that I wanted to make a winter themed card. I stamped her with a pale brown ink and colored the image with Copic markers. I stamped some snowflakes and the sentiment.
I adhered the layers of card stock using  E-Z Runner® Permanent Strips.I added a few Petite Posies from Queen & Co,  using Dodz-micro Adhesive Dots.  I also added a vertical bow tied with jingle bells.  To prevent them from flopping around, I secured them with Dodz-Medium Adhesive Dots. 
I hope you have a wonderful weekend!  Get LOTS of shopping done! :)