Tuesday, September 25, 2018

Chef Penguin!

Good morning!
I have another card to share with you using this adorable stamp called, Penguin Baker!

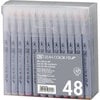
I stamped him on water color paper and water colored him using my Zig Clean Brush Markers. 
I used an older Spellbinder's die and mounted it on red card stock. 
I adhered the image to a kraft base and added a brown gingham ribbon tied with rustic twine.  I glued a few sequins on to finish off the card!

Thank you so much for stopping by!!

Supplies used:
Penguin Baker Rubber Cling Stamp

Monday, September 17, 2018

No Line Gardening Penguins!

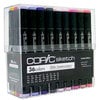
Hope you all had a great weekend! I am back with a trio of cards using this super cute set from Whimsy Stamps.  The set is appropriately called, Penguin Gardener.  I stamped it in a light grey ink and used my Copic markers to color them.  I love the look of no line coloring, as to me it gives a story book look. 
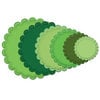
I love the look of round cards for a change of pace!  I used various Spellbinders dies, circle, pinking shear, and scalloped.   

Each sentiment was stamped in a slightly different way.  For the card below I took the sentiment and shaped it on the acrylic block to give it a curve.  This is one of the many reasons I love working with clear stamps! It is easier to manipulate the stamps!
A few sequins, a little flower, and the cards were complete!

Penguin Gardener Clear Stamps

Wednesday, September 12, 2018

A Pie Box All Gussied Up!


Good morning!
When I moved this past February I rediscovered some a lot of stuff that had been pushed back into corners.  Does that happen to you?  Too many corners for things to hide? ;)
I found these pie boxes by Sizzix and thought they would be perfect with Whimsy Stamp's Peony dies.  
I am a total sucker for flowers.  And pies. :)
I cut the flowers with water color paper and used my Zig Clean markers to add some vibrant color. 
I attached the flowers and leaves with foam tape. I added ribbon, rhinestones, and a few teeny flowers I had in my stash. 
The sentiment is from the Penguin Gardener set.  It was stamped on black paper with Versamark ink and white embossing powder.  

Thank you for paying me a visit!  I always appreciate it!
Supplies used:
Peony Flower Die
Penguin Gardener Clear Stamps

Friday, September 7, 2018

Rainbow Flower Background!

Hello! And welcome to another creation using products from Whimsy Stamps! 
I have a bit of an addiction to flowers.  Flower stamps. Flower dies. Silk flowers, fake flowers, real flowers.....well you get the idea! 
I used the Peony Flower die in a loose rainbow pattern.  I adhered them to white cardstock and cut off anything that was hanging off of the edges. 
I popped up the flowers and added coordinating rhinestones for the centers.  The sentiment was part of the Penguin Gardener set.  (See sets below) It was stamped in Versamark and heat embossed with white embossing powder. It was a pretty fast card to make and I love how dimensional it came out.  Kind of begs to be touched doesn't it?
Thanks so much for stopping by!!

Supplies used
Peony Flower Die
Penguin Gardener Clear Stamps

Tuesday, September 4, 2018

Guest Designer for Whimsy Stamps!

Good morning!
I am excited to share that I am a guest designer for Whimsy Stamps this month!
They have the cutest stamps evah! 
I love this little dragon stamp called, Dragon Party....because who does't love a dragon bringing presents and a balloon? 
I stamped the image using Tim Holtz Tea Dye ink onto kraft card stock and then colored it using Prisma colored pencils. I added some fun fluff to his party hat using a white gel pen. 
The image was so fun that I kept the layout fairly simple and layered over black and orange card stock.  I tied orange grosgrain ribbon with black twine.  For the center I had this random little squishy flower that was at the bottom of my drawer.......so of course I have NO idea who made it! LOL! But it matched perfectly, so I used it! 
I hope you enjoyed today's post because there will be many more to come this month! ;)
Have a wonderful day my friends!
Dragon Party Rubber Cling Stamp

Thursday, August 23, 2018

Fore You!


My dad's birthday is coming up in September and I thought I'd use this cute Newton's Nook stamp called, Winston's Tee Time.  I colored it with Copic markers and used the coordinating die cut.  
I created the background using water color paper and Distress Inks. I spritzed it with a bit of water and popped my golfer up with Crafty Foam Tape.  I  stamped part of the sentiment on black paper and embossed it in white.  I wanted the title to be front and center, so the words, Fore You were cut using die cut letters from MFT.  I colored them in with a gradient effect using Copic markers.  
I added glossy accents to the letters and the bear's nose. For a finishing touch, I tied a coordinating ribbon and a few sequins. 
I am back at school. Can I just say something?
I am TIRED! 
I think standing all day and being "on" all day is wearing me out! LOL!
It's going to take this ole' gal a couple of weeks to get used to this school/work routine!
I think I may sleep all weekend.......
ZZZZZZZZZZ

Tuesday, August 14, 2018

New York is Always a Good Idea!

Good morning!  I've been in my craft room here and there creating in between working at school.  Open house is Thursday and I close to being ready!
I used this cute Newton's Nook stamp. I stamped him on kraft paper and colored his shirt in two shades of Copic markers.  I added fur with a white gel pen. 
I wanted to mix the title up a bit, so I die cut part of the sentiment using Lawn Fawn's alphabet set. I cut red paper and added glossy accents to it.  I stamped the rest of the sentiment from the Newton's Nook set on white paper.  
I drew the heart in with a black thin marker and colored it with the same shades of blue Copic markers.  I adhered a few black sequins and star sequins to finish it off.  
Two years ago, Brian and I visited New York for the first time.  We fell in love with the city's energy! This was my absolute favorite picture with Times Square behind us! 
Thank you for popping by! 

Supplies:
Here are some of the supplies I used to make my card. Click on the link to go directly to the product. Where available I used compensated affiliate links which means if you make a purchase I receive a small commission at no extra cost to you. Thank you so much for your support!