Showing posts with label Queen and Co.. Show all posts

Monday, August 6, 2018

Sweet Soft Serve!

I hope you had a great weekend! 
We had a bit of a "Stay-cation" weekend.  
We took our son out for the day Kayaking, lunch, shopping, and a movie. The next day we hung out at a friend's pool.  I am trying to squeeze in as much summer as I can before I head back to school!
Ice cream=summer.
Am I right?
Don't get me wrong, I could eat ice cream 365 days a year, but summer? A perfect fit!
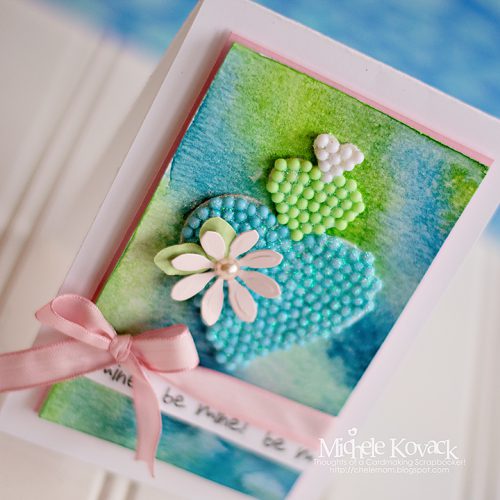
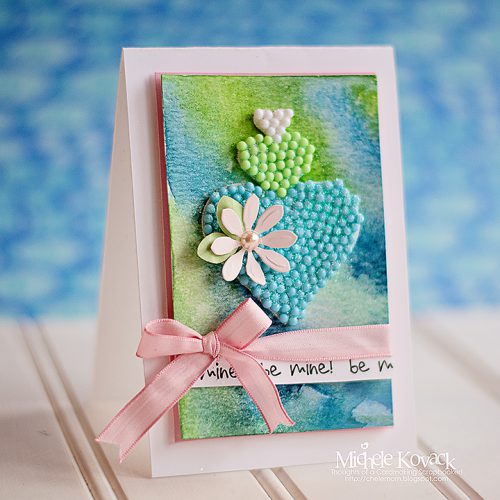
I used the Spellbinder's Sweet Treats set again for this card.  I die cut them and inked them up with Tim Holtz inks. I covered them in glossy accents and added Queen & Company's Pops and some glitter.  
I used My Favorite Things Die cut letters, inked them up and adhered them directly to the ice cream. 
I used Gems from Queen & Company and coordinating card stock behind the image.
For a final touch, I tied white tulle to the top of the card. 
I appreciate you stopping by today!
Enjoy your day!

Wednesday, January 10, 2018

Touchable Texture!

Good morning!
I apologize for being away so long. Let me tell you what is going on in this crazy life of mine.  During my Christmas break we sold our house and then bought a new house!  It has been a stressful emotional journey.  We've lived in our house for 26 years and there a lot of memories attached to this house. But we also felt the house is too much for us and we wanted to simplify a bit.  So we found a townhouse that would require no yard work at all and a smaller footprint inside. So between lawyers, loan officers, realtors, purging, and packing, my time has been very occupied.  (Imagine trying to pack up your scrapbook room! ACK!)
I am trying to take it one step...one day...at a time.

Today's card is up on the Scrapbook Adhesives's blog.
Creating Heartful Texture to Cards by Michele Kovack for Scrapbook Adhesives by 3L
The fun little pop beads are from Queen & Company. 


My posts will be a bit sporadic until we move and get settled. Our closing is soon....Feb. 16th. 
Wish me luck that I don't lose my mind!
And for those of you that have moved, please pass along any advice!
Thank you friends for stopping by and paying me a visit!

Monday, December 18, 2017

Shaker Ornament!

Okay folks, it's getting real now. 
Christmas is less than a week away.
Am I freaking out a little bit?  Possibly.
Is my shopping done? Nope.
Is my baking done? Nope.
Am I in the Christmas spirit? Absolutely!

I created this shaker ornament using Spellbinder's dies, acetate, a Fancy Sentiments Sticker from SRM, and these cute little fillers from Queen and Co.
The Poinsettia was cut using a Spellbinder's die and giving it swipes of color with a Copic marker.  I dabbed a bit of glue in the center and added more of the solid beads from Queen and Company.  Everything was glued to the top of the ornament. 
Thanks so much for stopping by!
Deep breaths people.....deep breaths! 
;)

Thursday, December 14, 2017

Coffee Lovers Blog Hop!

Good morning! 

So I am glad to be participating in the Coffee Lover's Blog Hop!
I used this cute little Coffee Plans stamp set from SRM Stickers!
For my card, I wanted to create a background using the coffee cup.  I stamped it in a brown ink and used Prisma Colored pencils.  I added a sentiment from the Stickers by the Dozen collection across the front.  I tucked a red die cut leaf behind it.  (After the leaf had been given a coating of glossy accents and glitter!)
I added a bit of rustic twine tied into a bow.  I scattered several gems and stars from Queen & Co.to the front. 

I rounded the back panel's edges on two sides and adhered the entire front to a kraft card.

Thank you all for stopping by!  I appreciate your visits!

Friday, November 24, 2017

No Line Coloring!

Good morning! I hope you had a wonderful Thanksgiving!
It is so hard to believe that we are officially in the holiday season!
I am up on the Scrapbook Adhesives blog today with another no line coloring card.  I had used this same stamp set by Prima before to create a birthday card. You can see that one HERE.  I loved it so much that I wanted to make a winter themed card. I stamped her with a pale brown ink and colored the image with Copic markers. I stamped some snowflakes and the sentiment.
I adhered the layers of card stock using  E-Z Runner® Permanent Strips.I added a few Petite Posies from Queen & Co,  using Dodz-micro Adhesive Dots.  I also added a vertical bow tied with jingle bells.  To prevent them from flopping around, I secured them with Dodz-Medium Adhesive Dots. 
I hope you have a wonderful weekend!  Get LOTS of shopping done! :)


Thursday, November 16, 2017

Shaker Teacher Card!

Good morning!  
It's been awhile....life has been crazy ( I think I say this a lot lately!) 
We are extremely involved in Cortney's group home, Misericordia.  Her dad an I serve on the board and I came up with an idea to create jewelry for the families.  I had worked with a local jeweler for over a year.  So with the holidays approaching we are attending numerous events and selling our jewelry.  (Proceeds all benefit Misericordia)

So crafting has been pushed aside lately.
I did manage to make a card for the SRM Blog though.  I used bits and pieces for the shaker portion, from Queen and Co
The apples were stamped on an oval frame from the Healthy Plans Clear Planner stamp. Each one was colored with Copics. I gave each apples a coating of glossy accents.  Once it was dry, I used the White Reminisce gel pen to give the apples a highlight. 
I used a teacher sticker from the Quick Cards Back to School set. 
I appreciate you stopping by today

Friday, November 10, 2017

Christmas Shaker Card!

Good morning! I hope you have had a great week!  
I am up on the Scrapbook Adhesives blog today with this Poinsettia shaker card.
A bit of crafty foam tape, acetate, and some fun shaker elements from Queen and Co!

I layered and assembled all of the pieces.  I cut a Poinsettia flower using a Spellbinder's die.  Copic markers gave it a bit of color.  It was adhered to the corner using Dodz Adhesive Dots. 
 I also added a bit of silk ribbon tied with silver twine. 


For more detailed information about the products used and how this card was made, please be sure to stop by the Scrapbook Adhesives Blog!

Thank you for stopping by!  I appreciate it very much!

Thursday, October 12, 2017

Guest Tutorial at Splitcoast Stampers!

Good morning! I am so thrilled to be participating in Splitcoast Stamper's Falliday Fest. 
I kind of feel like a superstar right now! ;)

I created a step by step tutorial on how I created this ornament using Scrapbook Adhesives by 3L Foam stickers, glitter, and a few fun trinkets from Queen & Company!
And since I am technology challenged, Dina Kowal also created a video for me,  with her take on these ornaments.  She created two gorgeous ornaments to share! 

You don't want to miss it! Be sure to hop on over to Splitcoast! 
:)

Friday, September 15, 2017

Coffee Lover's Blog Hop!!

Good morning coffee lovers!! 
I am so glad to jump on in to the Coffee Lover's Blog Hop!
I created this card using SRM's new stamp set called, Coffee Plans and incorporated it with a fun Silhouette cut called, Coffee Pulse.

The background was stamped in a light brown and the coffee bean.  I adhered my die cut and used my Misti to line up the words, including the hashtag, around it. 

I added a few teeny punched hearts covered them with glossy accents and sunk a bitty Queen and Co. flower in the center.  When it was dry I added some black enamel accents to the centers of the flowers and few scattered around.  
What a fun day for a hop! TGIF!
Have a great weekend friends!