Showing posts with label Scrapbook Adhesives 3L. Show all posts

Thursday, August 23, 2018

Fore You!


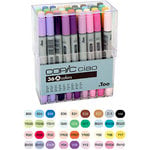
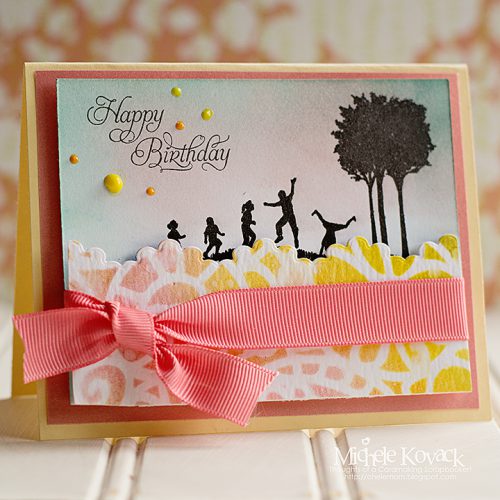
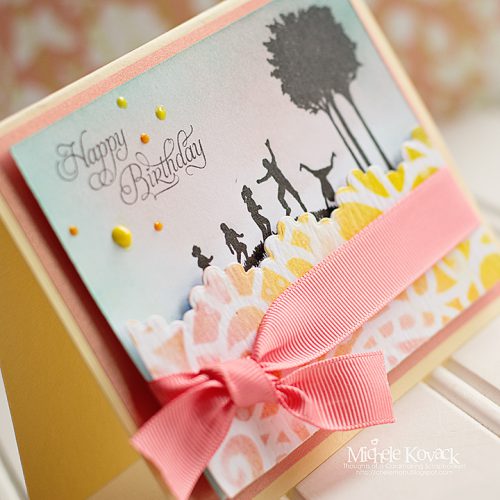
My dad's birthday is coming up in September and I thought I'd use this cute Newton's Nook stamp called, Winston's Tee Time.  I colored it with Copic markers and used the coordinating die cut.  
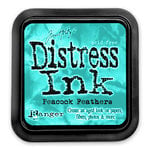
I created the background using water color paper and Distress Inks. I spritzed it with a bit of water and popped my golfer up with Crafty Foam Tape.  I  stamped part of the sentiment on black paper and embossed it in white.  I wanted the title to be front and center, so the words, Fore You were cut using die cut letters from MFT.  I colored them in with a gradient effect using Copic markers.  
I added glossy accents to the letters and the bear's nose. For a finishing touch, I tied a coordinating ribbon and a few sequins. 
I am back at school. Can I just say something?
I am TIRED! 
I think standing all day and being "on" all day is wearing me out! LOL!
It's going to take this ole' gal a couple of weeks to get used to this school/work routine!
I think I may sleep all weekend.......
ZZZZZZZZZZ

Friday, August 10, 2018

Hello Friend!

I had a left over popsicle die from my other two cards and simply could not waste it!
It was too cute and in my favorite flavor.......cherry!
It was colored with Copic markers and given a bit of sparkle.  I added a teeny flower, leaves, and gold string. I colored the yellow and orange panel with Copics and heat embossed the sentiment using gold Nuvo embossing powder. 
The "cracked" back panel is an old retired JustRite stamp that I stamped in orange.  
The final layer is a Spellbinder's die that I adhered to a light blue panel.  I went a little a lot nuts with the glitter!  
My room at school is nearly set up and open house is next Thursday.  As sad as I am to see summer winding down, I am ready for my next class of kiddos! 
Have a great weekend my friends!

SUPPLIES

I’m listing the products I used below. Click on the link to go directly to the product. Where available I use compensated affiliate links which means if you make a purchase I receive a small commission at no extra cost to you. Thank you so much for your support!


Thursday, August 2, 2018

Using Die Cuts as Background Paper!


Good morning friends!
I probably should have changed my sentiment here to "farewell" summer.......but I am in denial.
School starts in 18 days and I've already been in my classroom getting things ready.
But I am just not ready to say goodbye quite yet.
Deny
Deny
Deny.
:)
I used Spellbinder's Sweet Treat dies here and cut 10 popsicles.  I colored each one using Copic markers. I added a layer of glossy accents and set them aside to dry. 
I cut the sentiment using My Favorite Things Alphabet dies.  
Once everything was dry I popped them up on the card using Scrapbook Adhesives crafty foam tape. I used tacky glue for the sentiment.  
I tied a white grosgrain bow to finish the card.                    
Thanks so much for popping by today!
I appreciate your visits!

Tuesday, March 27, 2018

Everything But the Kitchen Sink!

Good morning!  
I have a card today that uses an old Stampin Up! set and lots of other eclectic elements!  I stamped the image in Versamark and heat embossed it in black.  I did a bit of Copic air brushing around it to create a sunset.  I used a stencil and Tim Holtz inks for the bottom and added it for an interesting grounding element. 
Mixed Media Birthday and a Fond Farewell by Michele Kovack for Scrapbook Adhesives by 3L
I added a grosgrain ribbon and a few epoxy dots to finish it off. 
I am in the process of getting my scrap room together and organized. I actually made a card last night!  Yay me!! I will be sharing it soon and hopefully pictures too!
Thanks for sticking it out with me!

Tuesday, March 13, 2018

I'm Baaaaaaack!

Good morning!  This past month has been an emotional whirlwind! We finally moved and said goodbye to our house of 26 years.  I shed quite a few tears but am starting to settle in to the new place.  Our wood floors were just done and vinyl plank flooring was ordered for my new craft room.  It has been difficult not having a place to craft, but hopefully by next month, I will have a new space ready for me!
My term on Scrapbook Adhesives is coming to an end this month.  I am a bit sad, but I think it is good timing, since life right now is incredibly busy.  I had a post the other day using this old Stampin' Up! set.  With all of the cleaning and purging I did, I kind of "rediscovered" many of my older sets.
It was colored with Copics and framed with a die cut I had cut using my Silhouette.  
I added layers of cardstock using Crafty Foam Tape and Adhesive Dots to keep the rhinestones and paper bow in place.  
I really appreciate you coming by for a visit and sticking it out with me! I am anxious for life to get back to some kind of normalcy!
Have a wonderful day my friends!

Monday, February 12, 2018

A Trio of Valentines...and an Update!

Good morning!  
I am 5 days away from the big move! My house is about 95% packed and there have definitely been a few tears.....but I am starting to get excited about the new place.  
I feel like it is the next chapter in my life!
My time with Scrapbook Adhesives is coming to an end as well.  (So many changes!).
I need to focus on what lies ahead at the moment and will hopefully return to crafting with a vengeance very soon!
Before everything was put away, I found these 3 adorable images from Suzy Plantamura.
Colorful Dimensional and Glittery Valentine Cards by Michele Kovack for Scrapbook Adhesives by 3L
I Copic colored this one, added some fun white gel pen details over glossy accents and used Crafty Foam tape in between the layers for dimension. 
For this next card I used Zig Clean Color Markers and loads of glitter! I added little gems to the centers of the X's  and a silver heart, using a Dodz-mini adhesive dots. 
You can see here how much dimension the Crafty Foam Tape gives!
My last card was colored using Copic markers and colored pencil.  
I love the detail the white pencil gives to the squirrel! I again added Crafty Foam tape between layers and a Dodz mini to adhere the bow/heart.  
This is it for me for a little while. I won't have Internet for about a week in the new house.
Fingers crossed that my closings go smoothly on Friday.
Thank you for your patience with me and for continuing to stop by.
It means the world to me! 


Wednesday, January 24, 2018

Rainbow Friends!

Good morning!
I am living in the midst of packing boxes, donations for AMVETS, Documents to sign, and phone calls galore. But finally everything seems to be falling into place and our move will hopefully take place on Feb. 16th.  
In the meantime my crafting stuff is pretty much in boxes, so I am working with the bare minimum.
I found this old SU! set and instead of tossing it, decided to resurrect it!
Rainbow Friends with Crafty Foam Tape by Michele Kovack for Scrapbook Adhesives by 3L
I channeled my inner Laura Bassen and created the background with Tim Holtz Distress inks and low tack post it paper in a rainbow pattern.  I flicked it with a bit of water for additional interest. The sentiment was stamped in black and colored with Copic markers.  I added a bit of height with glossy accents.  
The panel was adhered to the rainbow background with Crafty Foam Tape. I added 3 rhinestones with Dodz Medium Adhesive dots. 
On top of all of this craziness, my Kyle turns 21 in a week and Cort has her 2 year meeting at Misericordia! Crazy how quick time flies!
Thank you for making me a part of your day today!

Wednesday, January 10, 2018

Touchable Texture!

Good morning!
I apologize for being away so long. Let me tell you what is going on in this crazy life of mine.  During my Christmas break we sold our house and then bought a new house!  It has been a stressful emotional journey.  We've lived in our house for 26 years and there a lot of memories attached to this house. But we also felt the house is too much for us and we wanted to simplify a bit.  So we found a townhouse that would require no yard work at all and a smaller footprint inside. So between lawyers, loan officers, realtors, purging, and packing, my time has been very occupied.  (Imagine trying to pack up your scrapbook room! ACK!)
I am trying to take it one step...one day...at a time.

Today's card is up on the Scrapbook Adhesives's blog.
Creating Heartful Texture to Cards by Michele Kovack for Scrapbook Adhesives by 3L
The fun little pop beads are from Queen & Company. 


My posts will be a bit sporadic until we move and get settled. Our closing is soon....Feb. 16th. 
Wish me luck that I don't lose my mind!
And for those of you that have moved, please pass along any advice!
Thank you friends for stopping by and paying me a visit!

Sunday, December 24, 2017

Merry Christmas Eve!

Good morning! Merry Christmas Eve to you!
I have a few quiet moments before the kids get up (yes, they are BOTH home!) and get moving! 
I created this fun card for the Scrapbook Adhesives blog and a Stampendous stamp. (Unfortunately, the set is no longer available) The Christmas tree was colored with Copic markers.  There are several dies that come with this set and I used it for the garland, cardinal, and star.  I added plenty of glossy accents and glitter too!
Christmas Tree Holiday Card Making by Michele Kovack for Scrapbook Adhesives by 3L
I wanted a bit of dimension so I popped the bird and star up using Crafty Foam Squares.  I held the sequins in place using Dodz-mini.  
I am keeping it short today! (like me!)
I will be back tomorrow with a card for Christmas! Hope you can have your morning coffee with me before you start your day!

Tuesday, December 19, 2017

A Little Somethin' Somethin'

Good morning! I am up on the SRM Blog today with a quick little gift idea!
I am a 4th grade teacher and like to get my co-workers a little somethin'
Food is always a good gift right? ;)
I grabbed a few of these glass jars from my over stocked basement full of crap stuff! 
I added two strips of double sided tape and rolled them in glitter. 
I added a bow I cut from my Silhouette and a cute sticker from SRM, appropriately called Gingerbread Stickers by the Dozen. Add a bit of food to the container and BAM, you are done!
This is my last week of school before our two week break.  The students and staff are heading out to the movies today to see Ferdinand and the Bull. It's always a lot of fun!
Have a great day!!

Sunday, December 10, 2017

Vintage Rusty Lid Ornament!

Good morning! I hope you are having a fabulous weekend!
I am up on the Scrapbook Adhesives blog today with a vintage ornament.  Over the years my style has evolved, but vintage still makes my heart flutter.
Over the summer I take lids from candles and soak them in vinegar water.  You can do this with silver jingle bells too! I leave them all summer until they are beautifully rusted! I die cut a circle to fit inside, sponged ink on the edges, and stamped the image in black. I colored it using Copic Markers. I added a bit of glimmer using a Wink of Stella pen.  
I didn't want the image to sit too far inside the lid, so I used Scrapbook Adhesives Crafty Foam tape.  I stacked 3 layers under the image and adhered it in place.  I used the Dual Tip Glue pen to add the glittery snow underneath her. 

I die cut the poinsettia using a Spellbinder's die.  I colored it with Copic Markers and then gave each layer a coating of glue using the Dual Tip Glue pen.  I sprinkled it with glitter.  I assembled the flower and wanted it to sit up on the lid, so I once again, used the Crafty Foam Tape underneath it.  I added some gems (Queen & Company) and dots of silver Stickles around the perimeter.  
Have a wonderful Sunday! Thank you for popping by!

Friday, November 24, 2017

No Line Coloring!

Good morning! I hope you had a wonderful Thanksgiving!
It is so hard to believe that we are officially in the holiday season!
I am up on the Scrapbook Adhesives blog today with another no line coloring card.  I had used this same stamp set by Prima before to create a birthday card. You can see that one HERE.  I loved it so much that I wanted to make a winter themed card. I stamped her with a pale brown ink and colored the image with Copic markers. I stamped some snowflakes and the sentiment.
I adhered the layers of card stock using  E-Z Runner® Permanent Strips.I added a few Petite Posies from Queen & Co,  using Dodz-micro Adhesive Dots.  I also added a vertical bow tied with jingle bells.  To prevent them from flopping around, I secured them with Dodz-Medium Adhesive Dots. 
I hope you have a wonderful weekend!  Get LOTS of shopping done! :)


Friday, November 10, 2017

Christmas Shaker Card!

Good morning! I hope you have had a great week!  
I am up on the Scrapbook Adhesives blog today with this Poinsettia shaker card.
A bit of crafty foam tape, acetate, and some fun shaker elements from Queen and Co!

I layered and assembled all of the pieces.  I cut a Poinsettia flower using a Spellbinder's die.  Copic markers gave it a bit of color.  It was adhered to the corner using Dodz Adhesive Dots. 
 I also added a bit of silk ribbon tied with silver twine. 


For more detailed information about the products used and how this card was made, please be sure to stop by the Scrapbook Adhesives Blog!

Thank you for stopping by!  I appreciate it very much!

Tuesday, November 7, 2017

Christmas Topiary-Handmade Holidays Blog Hop!

Blog Hop 2017 Banner Idea 2.jpg
Good morning my fellow crafty peeps! I am excited to be participating in the Handmade Holidays Blog Hop!  Today I have a  Christmas Topiary! I have a friend who LOVES pink and I thought I would make her a tree to match her craft room!  
The base of the tree is a flower pot that is so sparkly in real life! 
And since I am a girl who is all about the sparkle, why not make the star on the top of the tree shimmer too?

It was an easy project to make and here are some of the supplies you will need. 
1. white paint
2. Pink paint
3. flower pot
4. cardboard cone
I painted the pot white and the cone pink.  You may be wondering why since it was going to be covered with flowers.  I like to do this to camouflage any gaps there might be.
These were the colors I used on my tree!  Who says you have to make them green?

I used Scrapbook Adhesives Dual tip pen to assemble the flowers and add silver micro beads to the centers. I did this in assembly line fashion! Once the flowers were dry ( I waited until the next day) I used a hot glue gun to adhere them to the cone. 
Dual Tip Glue Pen,  Home and Hobby, 3L Corp Adhesive
I cut two stars using a Spellbinder's star die. I used a sheet of music note scrapbook paper to add a vintage feel to the project. 

I gave each star a coating of glossy accents and sprinkled Diamond Dust glitter over it. 

I adhered them to a wooden dowel and used clips to glue it into place until it was dry. 
I added a silk ribbon. 
I glued the star/dowel to the opening at the top of the cone.  


I am so glad you were able to hop along with us! 
Hope you leave here inspired!