Showing posts with label Stampendous. Show all posts

Wednesday, July 25, 2018

Travel Wall Decor, Camper Card!

 Good morning!
So I came from a city house that was pretty boxy and had standard ceiling heights.  When we moved, one of the features of the town home that I loved were the cathedral ceilings.  Unfortunately, I was a bit stumped as to how I wanted to fill this space.  When we traveled to Alaska, it hit me. Create a wall that celebrates all the places we've been!
Our family has been blessed to have had the opportunities to see so much! My kids have been to Disney numerous times, Jamaica, Mexico, Busch Gardens, and lots of other Midwestern states. The last couple of years has afforded Brian and I the chance to travel alone. In the last two years we went to Vegas, New York, San Francisco, Nashville, and Alaska. We have definitely been bitten by the traveling bug and are hoping to go somewhere next summer!
I love that this wall can be added to as the years go by.  :)
Now, on to my card!
I found this stamp set by Stampendous(Campground)at Michaels and knew I had to have it.  I have a friend who has a camper very similar to this, so I wanted to make this for her.  I hadn't pulled out my Prisma Colored Pencils in quite awhile, so I decided to use them here. 
I added little yellow rhinestones to the stars. 

I used a white gel pen to fill in the words, Road Trip and then added a bit of glossy accents to make them stand out a bit.  

For my final touches, I tied rustic twine to the left of the sentiment and added a few more rhinestones. It was such a fun card to color! 
Thank you for stopping by today! I really appreciate your visits and your comments!


Sunday, December 24, 2017

Merry Christmas Eve!

Good morning! Merry Christmas Eve to you!
I have a few quiet moments before the kids get up (yes, they are BOTH home!) and get moving! 
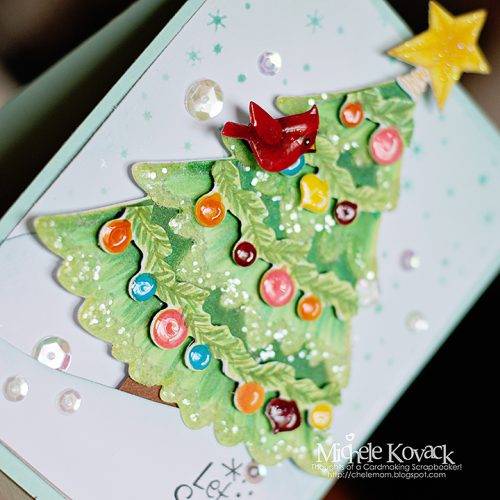
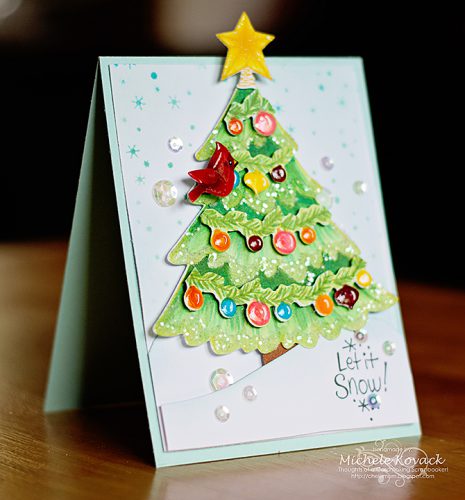
I created this fun card for the Scrapbook Adhesives blog and a Stampendous stamp. (Unfortunately, the set is no longer available) The Christmas tree was colored with Copic markers.  There are several dies that come with this set and I used it for the garland, cardinal, and star.  I added plenty of glossy accents and glitter too!
Christmas Tree Holiday Card Making by Michele Kovack for Scrapbook Adhesives by 3L
I wanted a bit of dimension so I popped the bird and star up using Crafty Foam Squares.  I held the sequins in place using Dodz-mini.  
I am keeping it short today! (like me!)
I will be back tomorrow with a card for Christmas! Hope you can have your morning coffee with me before you start your day!

Sunday, September 24, 2017

Stampendous, Scrapbook Adhesives, and No Line Coloring!

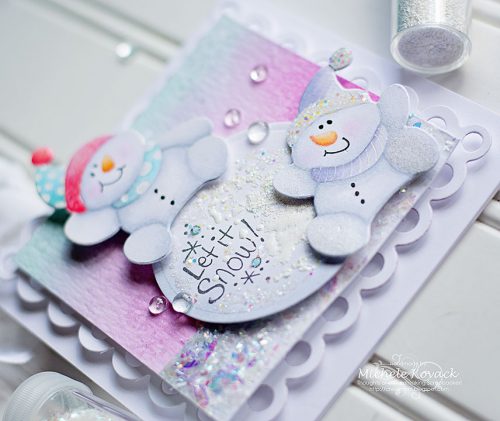
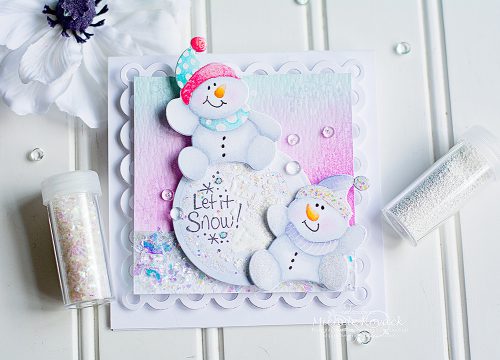
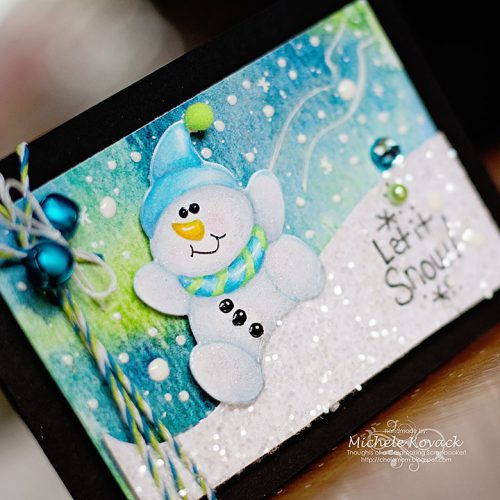
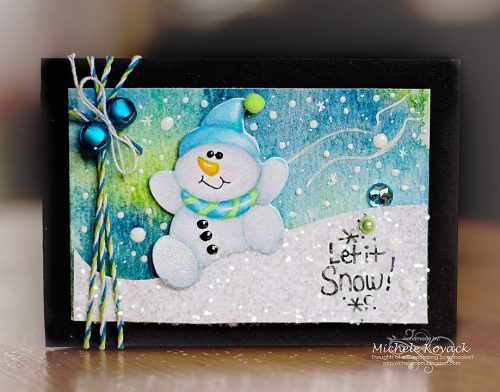
Good morning! I have a couple of winter inspired cards! (As I am sweltering in this 90+ heat in Chicago!) I didn’t officially participate in the Stampendous blog hop a few days ago, but that doesn’t mean I can’t still love on their cute stamps called Snowmen Trio! 
For this first card I used a no line coloring technique.  I stamped it in a very pale blue and once I Copic colored it, the stamped lines fade into the coloring. 
 I cut a circle and made it my large snow ball by adding glitter and embossing powders from Stampendous! called Frantage Encrusted Jewels! So much fun to just sprinkle and heat ’em up!  I used more Crafty Foam Tape to pop up the snowmen and my snowball.
The second card was also done using the no line coloring technique.  The background was done with water colors but in a bit more vibrant palette. Instead of a snowball, I hand cut a snowy hill for this guy to slide on! I covered it with glue using the Dual Tip Glue Pen and then sprinkled it with glitter. Next, I adhered the hill and snowman with Crafty Foam Tape. For a final touch, I attached pearls and rhinestones with Dodz Adhesive Dots Mini.
Snowmen cards by Michele Kovack
I added a bit of coordinating twine, jingle bells, and a few rhinestones/pearls.
Thank you all so much for stopping by today!
Cortney is home for the weekend, so her and I are heading to the pool again!  It is unbelievable that it is 90+ degrees here in Chicago!  (But I will take it! Winter will be here soon enough!) ;)

Wednesday, July 20, 2016

Hello Sunshine with PolyChromo Pencils! (And a bit of San Francisco too!)


Created by Michele Kovack
Good morning my friends!
Before I left on my vacation I had created this card using a cute stamp set from Stampendous and my Polychromo pencils.  I sponged the edges with a light blue ink and added a sticker from SRM's Sentiment/Spring collection.
I also added a few sequins, glittery clouds, and a water colored sun.
Created by Michele Kovack
To the very bottom of the card I added SRM's Sticker Stitches in black to help balance the card. 
Created by Michele Kovack
We had such a great time in San Francisco! 
I took quite a few pictures, but of course, being the one who took them, I am not in too many!  But this one, our tour guide captured on our way to sunny, warm Napa.  As you can tell in the picture, San Francisco was anything but warm and sunny! It was quite cold and misty.  But I love the bridge behind us, with the heavy fog.......and of course me and the hubby snuggling to keep warm! ;)
And one last thing I want to mention, over the next few days there is a fun blog hop going on with Scrapbook Adhesives by 3L and My Favorite Things Stamps! 
I will be sharing what I created tomorrow!  Be sure to pop over there and check out what my fellow design team members created!
Thank you for stopping by today!

Friday, June 24, 2016

Polychromo Pencils and a Summertime Image!

Created by Michele Kovack
Good morning my fellow crafty sisters! (And maybe brothers too?  Not sure who really reads this lil' blog!) I am up on the Scrapbook Adhesives by 3L blog today with this fun summertime card! The image and sentiment are from Stampendous.  I stamped it on kraft cardstock with black Memento ink.  I recently purchased the Polychromo pencils and decided to practice a bit with them. To line up my sentiment I used my Mini Misti.  I added Stickles to the water as well as glossy accents.  I wanted it to look like the water was glittery and bright from the sun.
Created by Michele Kovack
I layered my image over white and a pink card stock base using Scrapbook Adhesives Crafty foam tape.  I tied Donna Salazar's Girlie Grunge twine in pink at the top.  I decided that the card didn't need anything else at that point.  (Sometimes it is difficult to restrain myself!)
Created by Michele Kovack
It is crazy to think that a year ago today Cortney was admitted to the hospital for the next 14 days, with a staph infection and subsequent skin flap. I didn't see much of summer last year.  Now one year later, she is living an incredible and busy life at Misericordia, and I am golfing, shopping, catching up with friends and family, crafting, and spending time with my hubby. What a difference a year can make!  
Tonight I am golfing for the 11th time this summer....dining el fresco afterwards.
Life is good.
:)
Thank you for stopping and supporting my incredibly inconsistent blog! LOL!

Friday, June 17, 2016

Inspiration From One of my Favorite Stampers and a Rainbow Challenge!

Created by Michele Kovack
Do you have a morning routine?
I do. ;)
I feed my pups, make my coffee, and sit down in front of my computer and peruse through my list of favorite stampy blogs. It is such a great relaxing start to my day, and also a great way to get inspired.  Recently, I fell in love with THIS card from one of my stamping idols, Laura Bassen.  I love everything she creates! Her videos crack me up because she has such a great sense of humor! (I appreciate people with a sense of humor!) I don't case too many cards, but decided to try my hand at a card similar to hers.
Created by Michele Kovack
I stamped the rows of butterflies using a Stampendous stamp and my Mini Misti.  It was embossed in white and colored in a somewhat loosely translated rainbow color pattern.  I splattered the background with white and black water colors for a bit of interest.  I added a sentiment from JustRite cut on white foam.  I added sparkly Stickles to it.  The sentiment was stamped on black and embossed on white. I added it to the front panel along with a few sequins. 
Created by Michele Kovack
I know my posts have still been a bit sparse, but summer has been so busy with baseball games, golf, graduation parties etc.  :)  
Life is good.
I truly appreciate you stopping by my little blog!
Have a wonderful day my friends!


Tuesday, May 10, 2016

Water Colors and Stickers!

Created by Michele Kovack
Good morning my friends! I am up on the Scrapbook Adhesives by 3L blog today! I love Donna Salazar's Oak Tissue tape and that became the inspiration for the rest of the card.
I water colored this flower stamp by Stampendous in shades of brown, red, and gold. I added pearls to the centers using SBby3L's DODZ™ Mini. The sentiment is by SRM Stickers.
Created by Michele Kovack
The flower was adhered to some Girlie Grunge twine and then layered over the background created with the Oak tissue tape. The rest of  the layers were given depth with SBby3L's Crafty Foam tape. I added a few sequins and again attached them with the new DODZ™ Mini . Much easier than glue!
Created by Michele Kovack
And now for my continue home improvement saga......
Dum, dum, dum.........
I had left a can of brand new white enamel paint on my kitchen table because I have been painting all of the baseboard on the main floor.  My dog must have been scratching at the table looking for food when her paw caught the edge of the handle.  She managed to pull the entire can down.  An ENTIRE gallon of white paint spilled on my brand new hardwood floors.  I was hysterical calling for Brian.  He grabbed the dog and threw her in the shower. (She couldn't get out and track more paint throughout the house)  We spent 3 1/2 hours cleaning up paint.  I ruined my clothes, 7 beach towels, and entire can of paint, (obviously), and 2 packs of new washcloths.  We got the paint up, but due to the amount of scrubbing we did, we managed to take off the varnish.
I was in tears.
I called my floor guy and he is going to come out this week to buff it and put another coat of polyurethane on the floor.  Unfortunately that means I have to empty out my kitchen.
Again.
*sigh*
Keep your fingers crossed that he can match the other side of the floor which is my living room.
My life is never dull
ever.
Some day we will laugh about this right? 
Oh, and the dog?
Don't worry, she lived to see another day. ;) 

Have a great one! 

Thursday, April 21, 2016

Stampendous and Scrapbook Adhesives by 3L Blog Hop!

Today I'm delighted to be taking part in a blog hop with Stampendous
I had the pleasure of working with Stampendous' lovely stamp and die set called, Lovely Garden.  The flowers and leaves were stamped with Versamark and embossed in white.  It was colored using my Zig Clean water color markers. 
Created by Michele Kovack
I used some of my favorite Scrapbook Adhesives by 3L products.  Crafty Foam Tape was used to create depth among the flowers as well as the shaker element. 
Created by Michele Kovack
I used the DODZ™ Mini  to adhere the sequins and pearls to my project. 

Created by Michele Kovack
Be sure to stop by the Scrapbook Adhesives by 3L blog for your chance to win one of three prizes!
Winners will be announced on April 25th!

********
And just in case you were wondering if I had left town or something, I hadn't! LOL! We had all of the carpeting ripped up on our main floor and had the wood floors refinished. Everything on the main floor was moved to my basement while we renovated.  That included my computer.  I am happy to say that the floors are done and we are slowly starting to move our furniture back up.
(Including my computer!)
So this gal is back in action!
Have a great day!

Wednesday, May 21, 2008

First Attempt at a Shaker Card!

Remember when shaker cards were all the rage? I would marvel at this interactive embellishment! I ordered this Sushi set (Stampendous) from Eclectic Paperie a few weeks ago and decided to try my hand at a shaker card. Let me just tell ya.....I am shaker challenged! I redid this card about 10 times! Ripping things off, starting over.... had micro beads EVERYWHERE! I ended up with this. I stamped on a transparency and colored it in with my Copics from the back. I cut it out using my Spellbinders Nestibilities. I also used them for the fishbowl as well. I added the foam all around the perimeter of the opening of the bottom piece. Add your microbeads and attach the top of the fishbowl. I added the starfish button to the bowl. I cuttlebugged the white background, added a ribbon, stamped the sentiment......and 4 hours later it was done! : )